
 The lid on this alabaster trinket box once sported a pane of beveled glass. When the original glue became discolored and brittle, the lid toppled to the floor, breaking the glass. After weighing my options, I decided to replace the missing glass with a clear, jeweler’s quality resin. As there is no “bottom” on this lid—it’s really just a frame—casting a new one required creating a false bottom to hold the resin while it cured. This same technique can be used for jewelry pendants, Christmas ornaments, sun catchers, or any situation where you would like to fill a small frame. If you enjoy working with resin, and are ready to move a tiny step beyond filling bezels, this would be a comfortable next step.
Materials:
- Box Lid or Frame
- Painter’s Tape or Masking Tape
- Resin of Your Choice (I used Envirotex Jewelry Resin) Note: Be sure to read and follow the safety instructions!
- Decorative Items to Embed (I used pressed flowers from Nature’s Pressed, Inc)
- Plastic Straw (for blowing on resin to break air bubbles)

Steps:
Prepare the Frame:
Here is the box and the hinged lid; you can see where the old glue had turned brown. I removed the remaining glue with a small amount of acetone. Next, I gave the frame a fresh coat of silver paint and sealer.
Prepare the Decorative Items:
Any items that might bleed color should be sealed prior to placing in the resin. This includes printed pictures, any items with ink or dye, and dried flowers.
Paper items, such as printed designs or photos, can be brushed with two coats of white glue or Mod Podge. Pay special attention to the edges! If your pictures are not completely sealed the resin can seep in and cause blotching. You might want to use a spray sealant for dried flowers, candy sprinkles, or other fragile or awkward items.
Create the False Bottom or Backing:
There is some discussion about what types of tape work best—I even heard some people say they used contact paper. Basically, you want to choose something that will seal around the edges to hold the resin in place, but not be so sticky that it leaves behind a lot of glue. If you have masking tape at home that will work fine. Be aware that if using more than one strip of tape you will end up with ridges, which you can smooth out later. I chose to use painter’s tape, and found some wide enough to use just one piece.
Apply your tape so it is taught; take special care to burnish the edges to create a good seal.

Filling the Frame:
Find a level surface where your project can rest, undisturbed, for a couple of days. Also, if you want the final product to have a domed appearance, or if you are embedding something, you may want to break this into a two step process (which means mixing the solution twice.)
For Doming—fill the frame about halfway. Let that set overnight before adding the final amount. This gives you a chance at a higher dome with less spill-over.
For Embedding—heavy items can sink to the bottom while lighter items tend to float, both can be frustrating!
For better results with heavier items, let your first application of resin set over night. The next day you can “glue” down you items with a bit of white glue. Let that dry completely. Then, add your second application of resin.
For lighter weight items such as dried flowers, you can place them in your first application of resin (you might need to push them down a couple of times—watch for air bubbles). Let that set over night; the next application of resin should cover any edges that might be too close to the surface.
When filling the frame, be sure to push the resin against the edges and into the corners. It can be thick, like honey, and might need a little coaxing to flow where you want it to go.
Keep an eye out for air bubbles while your resin cures; blowing warm air through a straw is usually enough to pop them.
Finishing:
Carefully remove the tape. Be ready for some resistance, after all, the resin has cured onto the tape—just go slow. Any tacky glue residue can be buffed off with a fine grade steel wool (#0000). To achieve a completely clear, unblemished bottom, just apply a thin layer of resin.
When I removed the painters tape from this project, I found that I actually preferred the textured appearance–it gives the underside a frosted look.

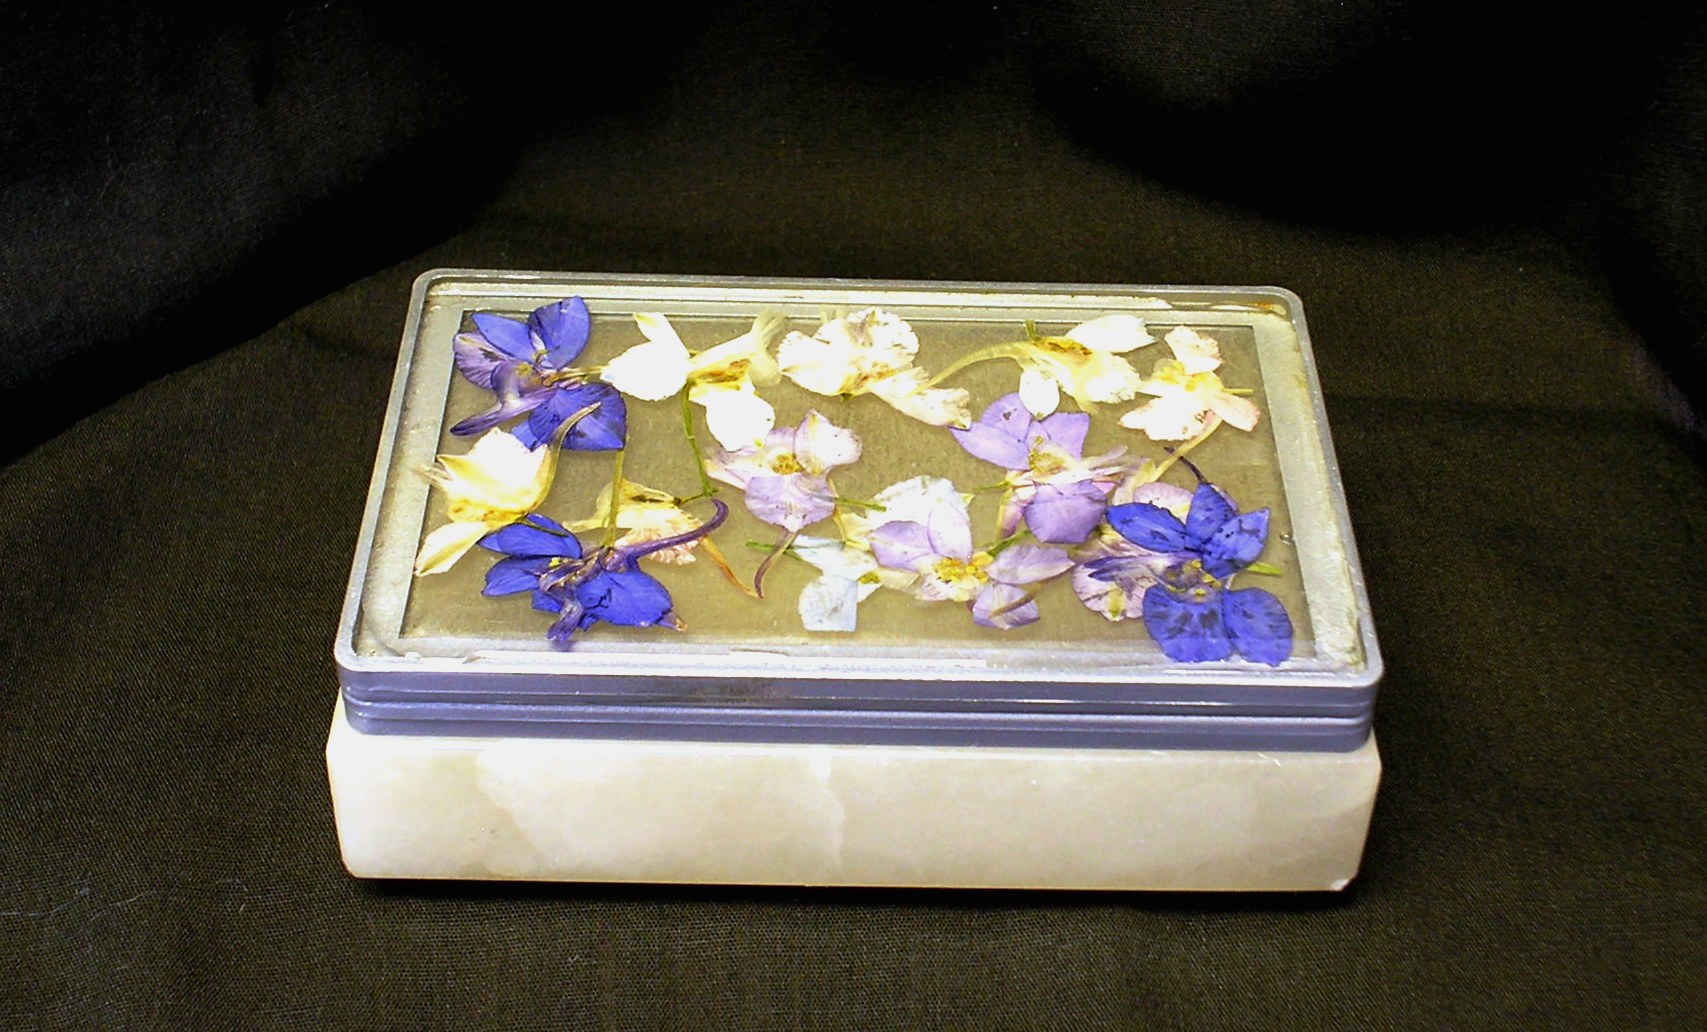
Here is the finished box! I used a small amount of E6000 to attach the repaired lid.
What resin projects are you planning?
