Park at Dusk Fall Table-Top Decoration

Capture the magic of an autumn evening in this table centerpiece!

Autumn Park Decoration Museiddity

Materials: Autumn Park Decoration materials Museiddity

  • Wooden Tray (for Base)
  • Moss of Your Choice for Ground Cover (I used a sheet of self-adhesive moss but did not remove the backing)
  • Brown-Paper Covered Floral Wire for Tree
  • Small Strand of Battery Operated Lights (I suggest the kind with a built-in timer)
  • Confetti or Silk Flowers to Snip (for the look of fall leaves)
  • Park Bench or Other Focal Points (Hint: look in the doll house or railroad items area at the craft/hobby store)
  • Other Ornaments of Your Choice (I added small “pumpkins” that I found in a bag of potpourri)
  • Heavy Gauge Wire Cutters
  • Heavy Duty Craft Knife or Small Saw
  • Wood Stain or Paint for Base
  • Sand Paper
  • Glue Gun
  • Clear Drying Craft Glue
  • Double Sided Tape (or packing tape folded over) to Secure the Battery Pack.

Steps:

Preparing the Stand:

An upside down tray works well for this craft as it allows you to hide the battery pack underneath. Taping the pack to the tray allows better access for changing batteries. So, the first step is deciding where you will place your tree and battery pack.

Using a small saw or knife, make a small notch in the side of the tray for the light strand to slip up into. Sand the edges of your notch. Autumn Park Decoration tray Museiddity

Stain or paint the sides of your tray.

Making the Tree:

Trees have personality, and the tree you create will set the mood for your centerpiece. The fun of making your own tree, as opposed to purchasing a pre-fabricated lit tree, is that you can make your tree as delicate or as thick and gnarled as you like! How you weave, braid, or twist the wire strands together will determine the look of the bark.

I suggest starting with three strands, each one a few inches longer that you think you will need to allow for length lost in the twisting. Braid or twist these three strands together, leaving a couple inches at each end loose for playing with roots and branches. Autumn Park Decoration tree Museiddity

Make at least three more sections like the one above.

Twist and weave these sections together, using another length of wire to hold them in place. As you work, decide which end will be the roots, and which end the branches. Autumn Park Decoration trunk MuseiddityAutumn Park Decoration roots Museiddity

When working the branches, take a few strands from a neighboring section at the trunk to weave into the base of the branch.

The roots will not only stabilize the tree, but keep it from unraveling. When working the roots, think of a web. Again, use strands from neighboring sections to form the web.

Putting it All Together:

Once you are happy with your tree, use the hot glue gun to secure it to the base. You might also want to place some glue in a few crevices of your tree trunk. Autumn Park Decoration mount Museiddity

Attach the moss for ground cover.

Attach any decorative items—park bench, pumpkins, bicycles, wheelbarrows, etc…

For fall color, snip some inexpensive silk flowers into confetti-like bits. Use craft glue to secure these onto the ground cover, the park bench, etc… You might even want to place a few on the tree as un-fallen leaves. Autumn Park Decoration leaves Museiddity

Once the glue is dry, simply wrap your light strand around the tree and tape the battery box (and any extra strand) underneath. Be sure your wire is setting in the notched area.

Autumn Park Decoration final Museiddity

I made this one last October and we decided to keep it out all year. I hope you enjoy your Park at Dusk Decoration as much as we do!

Advertisement

Casting a Resin Replacement for a Glass Lid on a Trinket Box

Casting Resin Lid for Trinket Box MuseiddityThe lid on this alabaster trinket box once sported a pane of beveled glass. When the original glue became discolored and brittle, the lid toppled to the floor, breaking the glass. After weighing my options, I decided to replace the missing glass with a clear, jeweler’s quality resin. As there is no “bottom” on this lid—it’s really just a frame—casting a new one required creating a false bottom to hold the resin while it cured. This same technique can be used for jewelry pendants, Christmas ornaments, sun catchers, or any situation where you would like to fill a small frame. If you enjoy working with resin, and are ready to move a tiny step beyond filling bezels, this would be a comfortable next step.

 
Materials:

  • Box Lid or Frame
  • Painter’s Tape or Masking Tape
  • Resin of Your Choice (I used Envirotex Jewelry Resin) Note: Be sure to read and follow the safety instructions!
  • Decorative Items to Embed (I used pressed flowers from Nature’s Pressed, Inc)
  • Plastic Straw (for blowing on resin to break air bubbles)

Casting a Resin Lid Museiddity

Steps:

Prepare the Frame:
Here is the box and the hinged lid; you can see where the old glue had turned brown. I removed the remaining glue with a small amount of acetone. Next, I gave the frame a fresh coat of silver paint and sealer.
Prepare the Decorative Items:
Any items that might bleed color should be sealed prior to placing in the resin. This includes printed pictures, any items with ink or dye, and dried flowers.

Paper items, such as printed designs or photos, can be brushed with two coats of white glue or Mod Podge. Pay special attention to the edges! If your pictures are not completely sealed the resin can seep in and cause blotching. You might want to use a spray sealant for dried flowers, candy sprinkles, or other fragile or awkward items.

Create the False Bottom or Backing:
There is some discussion about what types of tape work best—I even heard some people say they used contact paper. Basically, you want to choose something that will seal around the edges to hold the resin in place, but not be so sticky that it leaves behind a lot of glue. If you have masking tape at home that will work fine. Be aware that if using more than one strip of tape you will end up with ridges, which you can smooth out later. I chose to use painter’s tape, and found some wide enough to use just one piece.

Apply your tape so it is taught; take special care to burnish the edges to create a good seal.

Resin Lid Casting Museiddity

Filling the Frame:
Find a level surface where your project can rest, undisturbed, for a couple of days. Also, if you want the final product to have a domed appearance, or if you are embedding something, you may want to break this into a two step process (which means mixing the solution twice.)

For Doming—fill the frame about halfway. Let that set overnight before adding the final amount. This gives you a chance at a higher dome with less spill-over.

For Embedding—heavy items can sink to the bottom while lighter items tend to float, both can be frustrating!

For better results with heavier items, let your first application of resin set over night. The next day you can “glue” down you items with a bit of white glue. Let that dry completely. Then, add your second application of resin.

For lighter weight items such as dried flowers, you can place them in your first application of resin (you might need to push them down a couple of times—watch for air bubbles). Let that set over night; the next application of resin should cover any edges that might be too close to the surface.

When filling the frame, be sure to push the resin against the edges and into the corners. It can be thick, like honey, and might need a little coaxing to flow where you want it to go.
Keep an eye out for air bubbles while your resin cures; blowing warm air through a straw is usually enough to pop them.

Finishing:
Carefully remove the tape. Be ready for some resistance, after all, the resin has cured onto the tape—just go slow. Any tacky glue residue can be buffed off with a fine grade steel wool (#0000). To achieve a completely clear, unblemished bottom, just apply a thin layer of resin.

When I removed the painters tape from this project, I found that I actually preferred the textured appearance–it gives the underside a frosted look.

Resin Lid Casting Underside Museiddity

Here is the finished box! I used a small amount of E6000 to attach the repaired lid.

What resin projects are you planning?

Easy Burlap Wreath with Corsage Style Ornaments

Burlap or jute wreaths are so easy to make! You can dress them up, or leave them casual–and decorate them for any season. Here are examples of my two most recent creations, along with the steps so you can hang one on your door today.

 Mother's Day Wreath by rlc

This one was made for Mother’s Day.


Autumn Burlap Wreath by RLCThis one was a “No-Sew, No-Glue” burlap wreath makeover. I wanted something more full.


Materials:

Wreath Form
Burlap or Jute Garland (or your former No-Sew Wreath)
Ribbon (optional)
Floral Wire
Wire Cutters
Corsage Style Ornaments (instructions posted on October 16, 2014)

Steps:

Prepare your materials:

Garland and Ribbon:

Decide how many strips of material you will want to use; the one pictured has three strips of burlap and one strip of decorative ribbon. To measure the length needed for each strip, hold the material against the outside edge of your wreath form and wrap the material around it at least 1 ½ times. This will give you enough extra fabric to “poof.”

Floral Wire for Securing Garland:

Measure out a few strand of wire to be readily available. Basically, these just need to be long enough to wrap around the thickness of your wreath form. Give yourself enough extra to allow for easy twisting of the ends—you can trim off any excess once the wreath is finished.

Create Your Wreath:

I began by taking apart my original wreath; this was easy as I created it with the idea of changing it with the seasons—it was just a matter of untwisting some wire. I’ll be using the same process to make this new version.

Gather the ends of your fabric strips, hold them against your wreath form, and secure with a wire twisted in the back like a twist tie. Autumn Burlap Wreath Start rlc

Now it is just a matter of playing with the fabric; securing it at the end of each section with a twisted piece of wire.


Once you’ve finished the body of your wreath, it’s time to add your decorative elements. I’ve used some corsage-style bouquets created by taking apart elements of floral stems and re-securing them with florist tape. These little bouquets are on florist wire. To attach, simply place the bouquet against your wreath, between two of the “poofs,” and wrap the wire stem around the wreath. Finish by bringing the end of the wire back around your bouquet and pinch it closed. Floral Tape Tutorial 006 rlc


Take a good look at your wreath—play with the fabric, adjusting the “poofs” so they cover the twist ties. Once you are happy with the result, turn the wreath over and trim off any excess wire. Autumn Burlap Wreath Back rlc

Combining Materials with Floral Tape

Floral Tape Tutorial 001 rlc

Let’s say you want to use one silk flower, a few feathers, and a seed pod to create a pick for a potted plant or a decoration for a wreath, how would you do that? Or, what happens when you don’t want to use all of the stems in silk bouquet, or you want to combine parts of several bouquets into one? One solution is to use floral tape. If you’ve ever purchased a corsage, this is what the florist used to piece those elements together.

I’m reworking my burlap wreath for autumn. I have several elements I’d like to include, but I want to use only parts of the stems I picked up at the craft store. Also, some of the elements are too long for my purpose. I’m going to take these decorations apart and make my own little arrangements.

Materials:

Wire Cutters
Scissors/craft knife
Floral Tape
Floral Wire
Flowers, Feathers, and Decorations of your choice.

If you look closely you’ll notice the original items are formed by taping several stems together. I’m simply going to take them apart, and create new decorations following the same principle. To take the stems apart you can use a craft knife to pierce the tape and then pull the stems in a downward motion to separate.

Floral Tape Tutorial 002 rlc


Floral Tape Tutorial 003 rlc


Next, decide what elements you want to include in your new decorative stems. Play with the lengths of the pieces. Hold them all together and see how they fit. Trim anything that is too long. Since my decorations will be wired onto a wreath I will need all the stems trimmed and the flowers and feathers taped onto flexible wire.

Once you’ve decided on the arrangement, it’s time to build each component. The tape needs to be touching each stem; if you simply hold the bundle together and wrap tape around it you’ll have items in the middle falling out.

Start with any items that now need wire stems such as flower heads or feathers. Cut a piece of florist wire, hold the flower head or feathers against the wire, and wrap the floral tape around the stem for one full turn, then continue to twirl your new stem around while spiraling the tape down the length of the stem until it feels secure. Repeat this for each small section of your new decoration. Floral Tape Tutorial 004 rlc

When each small section is ready, take your center flower and one other section and wrap them together with the tape. Add a third section and graft that onto the stem. Continue until all elements are combined. You only need one main stem, so trim away some of the wires and continue wrapping so that the sharp edges are covered. Floral Tape Tutorial pic


You now have your own unique decorations to use in wreaths, over doorways, wrapped around candle holders, etc…

Floral Tape Tutorial 006 rlc  Floral Tape Tutorial 007 rlc

Come Play with the Sirens!

October is here, which means its time to head the Siren’s call to celebrate Halloween/Samhain/Harvest Time. Each year Samhain’s Sirens orchestrate a month long virtual party and everyone is invited; they share legends, recipes, music, crafts…and everyday they give away handmade gifts! ss12


Join me today to learn how to make a Remembrance Wreath—a leaf for every loved one passed. We’re giving away a kit to get you started on making your own wreath! While you’re there, don’t forget to check out the previous posts for yummy recipes and other fun. Remembrance Wreath Finished by rlc

Craft Pumpkin Punkin Sprite

Punkin Sprite Decoration by rlc

I’m sure you’ve heard of woodland sprites, but did you know there are sprites in your vegetable garden? Unlike the Woodland Sprites, Punkin Sprites only visit this dimension during the time of the last harvest. Once the last pumpkin is picked, and the last row of corn is harvested, Punkin Sprites go back to their home.

Happy and playful, Punkin Sprites sing songs to make pumpkins and other squash grow big—in fact, they are a bit competitive, but it’s all in fun! Celebrate the joy of autumn by making your own little Punkin Sprite!

Materials:

Craft Pumpkin
Beads or Buttons for eyes
Silk Flowers or Moss for eyebrows and hair
Craft Paint and Sealer
Epoxy Clay of your choice *See notes on working with epoxy clay
Protective Gloves—craft/hospital/work gloves
Pop-Up Cleansing Cloths
Adhesive or Glue Gun
Wax Paper to protect work station while working with epoxy clay
Craft Knife
Awl or Skewer
Paint Brushes or Foam Brushes
Pencil

Preparation:

Prepare your work surface by placing wax paper on your table to protect it from the epoxy clay.

If unfamiliar with epoxy clay, please read notes at the bottom of this post.

(Clay dries quickly; when making the eyes, nose, ears, etc… mix only enough clay for one item at a time.)

Step One—Making a Face

Begin by marking placement for the eyes, nose, ears, and mouth. Once you have decided on the placement, lightly score the pumpkin to ensure a good epoxy adhesion.

Beginning with the ears, mix a small amount of Part A epoxy with equal amount of Part B. work the two parts together until pliable and tacky. Form this into the desired shape for the ear and press it into place. Make any adjustments needed to the shape and set the pumpkin aside. Repeat for the second ear. Punkin Sprite Ear by rlc

For the eyes, you’ll be making three parts. One is the foundational piece or back of the eye into which you will press your bead or button. Then you will make an upper and lower eyelid to help keep the bead in place.

Mix a small amount of clay and smooth out into a flat, almond shape. Press that onto the pumpkin. Press your bead or button into the clay.

Punkin Sprite Eye by rlc  Punkin Sprite Eye Lid by rlc


Next, mix a small amount of clay and separate it into two parts. Roll each into a small tubular shape to go just along the upper and lower lid area on the eye. You want it to cover the bead just a little bit to help keep the bead in place. Work the eye until you like the result. If any clay gets on the bead you can use a cotton swap dipped in soapy water or alcohol to remove the residue.

To make a nose, mix up a small amount of clay and work it into a ball or tube shape. Press this onto the pumpkin, smooth down the edges to blend into the face and finish forming a nose.  Punkin Sprite Nose by rlc

Form the mouth by molding the clay into the basic shape you want, pressing this onto the pumpkin and molding the lips into shape with your thumb and forefinger. Be sure to smooth the edges onto the pumpkin so the mouth looks like it is part of the face, like you did with the nose.

Once all your facial features are in place let them cure for at least twenty minutes.

Step Two—Painting

At this point your pumpkin and your clay are probably different colors. Before painting the features of your Punkin Sprite, I recommend an all-over base coat in a light color such as Onion or Mushroom. This will help your painted features to be more uniform in color. Punkin Sprite Base Coat by rlc

Once the base coat is dry, continue to paint the face and ears. Once finished be sure to seal the paint with the appropriate sealer. Punkin Sprite Painted by rlc


Step Three- Hair, Eyebrows and other Accents

How you attach your Sprite’s hair and eyebrows depends on the materials you are working with. For instance, I wanted to work with silk stems. To get the look I wanted for the hair I punctured the pumpkin at the stem and used a skewer to enlarge the hole. I then applied a bit of craft adhesive (you can use your favorite craft glue or a hot glue gun) and inserted the stems. The eyebrows are simply leaves from the same silk stem, cut to length and glued on.

My Punkin Sprite by rlc

Give your Sprite even more personality with a hat or other accessories!

*Notes—Epoxy Clay

Epoxy clay (or two-part epoxy adhesive) can be found in craft stores by the jewelry supplies or at your local hardware store by the plumbing supplies. They work the same way but have different textures and curing times…and smell. The jewelry clay is smooth and warms quickly in your hand. It has a longer work time and a better smell. You can expect to pay about $12.00 for two 1.6 oz tubs (parts A & B). Plumbing clay has a more granular texture and an industrial-type smell, you can expect to pay about $6.00 for a 2 oz tube containing both A & B. In my example, I used plumbing epoxy for the ears and jewelry epoxy for the other features.

Epoxy clay dries quickly and once it is dry it is pretty much permanent, so please protect your table…and floor!

Gloves are recommended as the clay may irritate skin. Keep some cleansing cloths nearby to wipe off hands and any tools you use.

Fall is Coming…!

Have you started on your Fall crafts? I’ve been buried in other work but am really looking forward to getting crafty again! I have an idea for a harvest/Halloween centerpiece I’ve been wanting to start on–somehow it’s just easier to get out the glue gun when it isn’t 110 degrees outside!

Speaking of Halloween, I’ll be at Samhain’s Sirens again this yeass12r with a Fall/Harvest craft to share! I can’t say too much, but this year’s craft has to do with your family tree. Their are 50 days left until Halloween, but these gals start the party on October 1st! My date is October 11th–then I can share the craft with you!

Speaking of sharing, what are you working on?

One more week of Summer–yay! I’ll be back in Autumn.

DIY Create Unique Florist-Quality Arrangements For Less Than Half The Cost

WhetherDIY mini greenhouse arrangement by rlc in the pages of a glossy magazine or the window of a boutique florist, at some time you’ve spotted a gorgeous flower arrangement you’ve wished was sitting in your house. What stopped you, was it the price? Today I’ll show you how to create a stunning flower arrangement for less than half of what it would cost at your local florist shop!

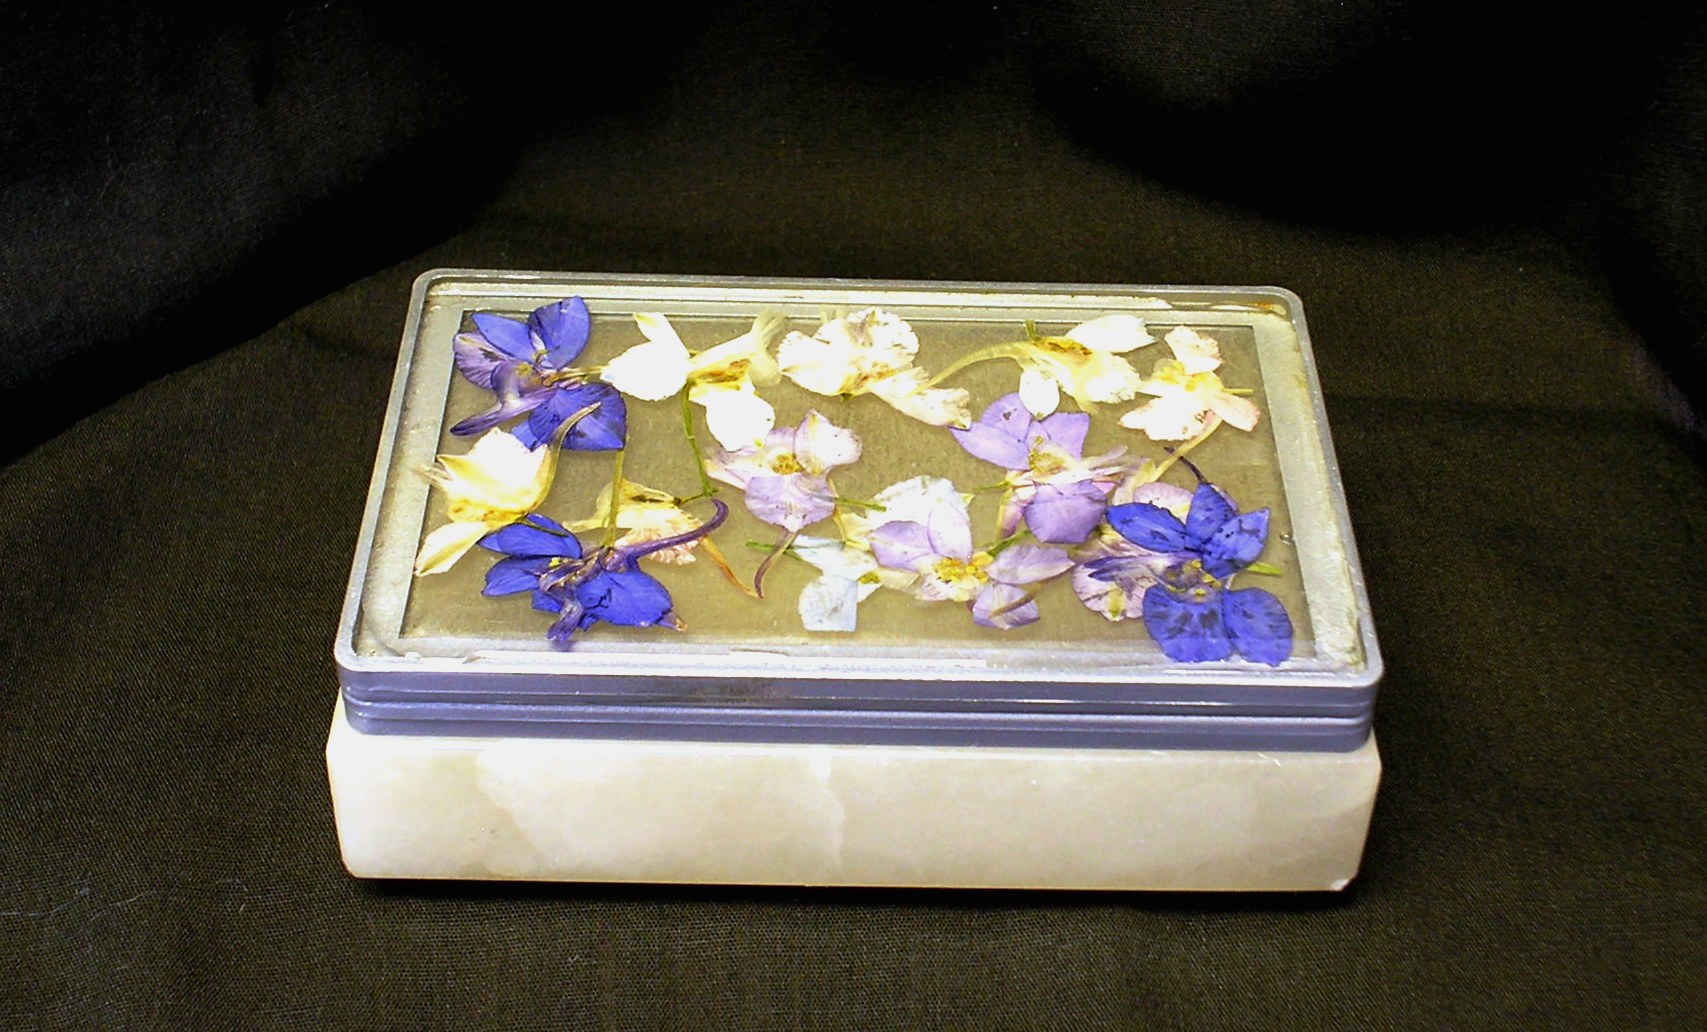
I’m using a mini-greenhouse terrarium purchased at Jo-Ann’s, but you can easily substitute any container. The tips I’m sharing are from my own experience working at a florist shop where I was responsible for creating all the FTD arrangements. I’ll start us off with a list of supplies in just a moment, but first let’s talk about flowers and greenery.

A florist will often begin her arrangement by placing a fair amount of “filler” such as greenery or baby’s breath. This is done to cover the sight of the floral foam, take up space, and reduce the number of “showy” flowers used in the arrangement. The problem with this is that sometimes the “filler” can impede the desired placement of your main stems. Although you can simply pull out the filler to insert your flower, this can potentially leave holes in your foam, which could expose your flower stems to air. For this reason, I usually begin with my flowers and insert filler at the finish.

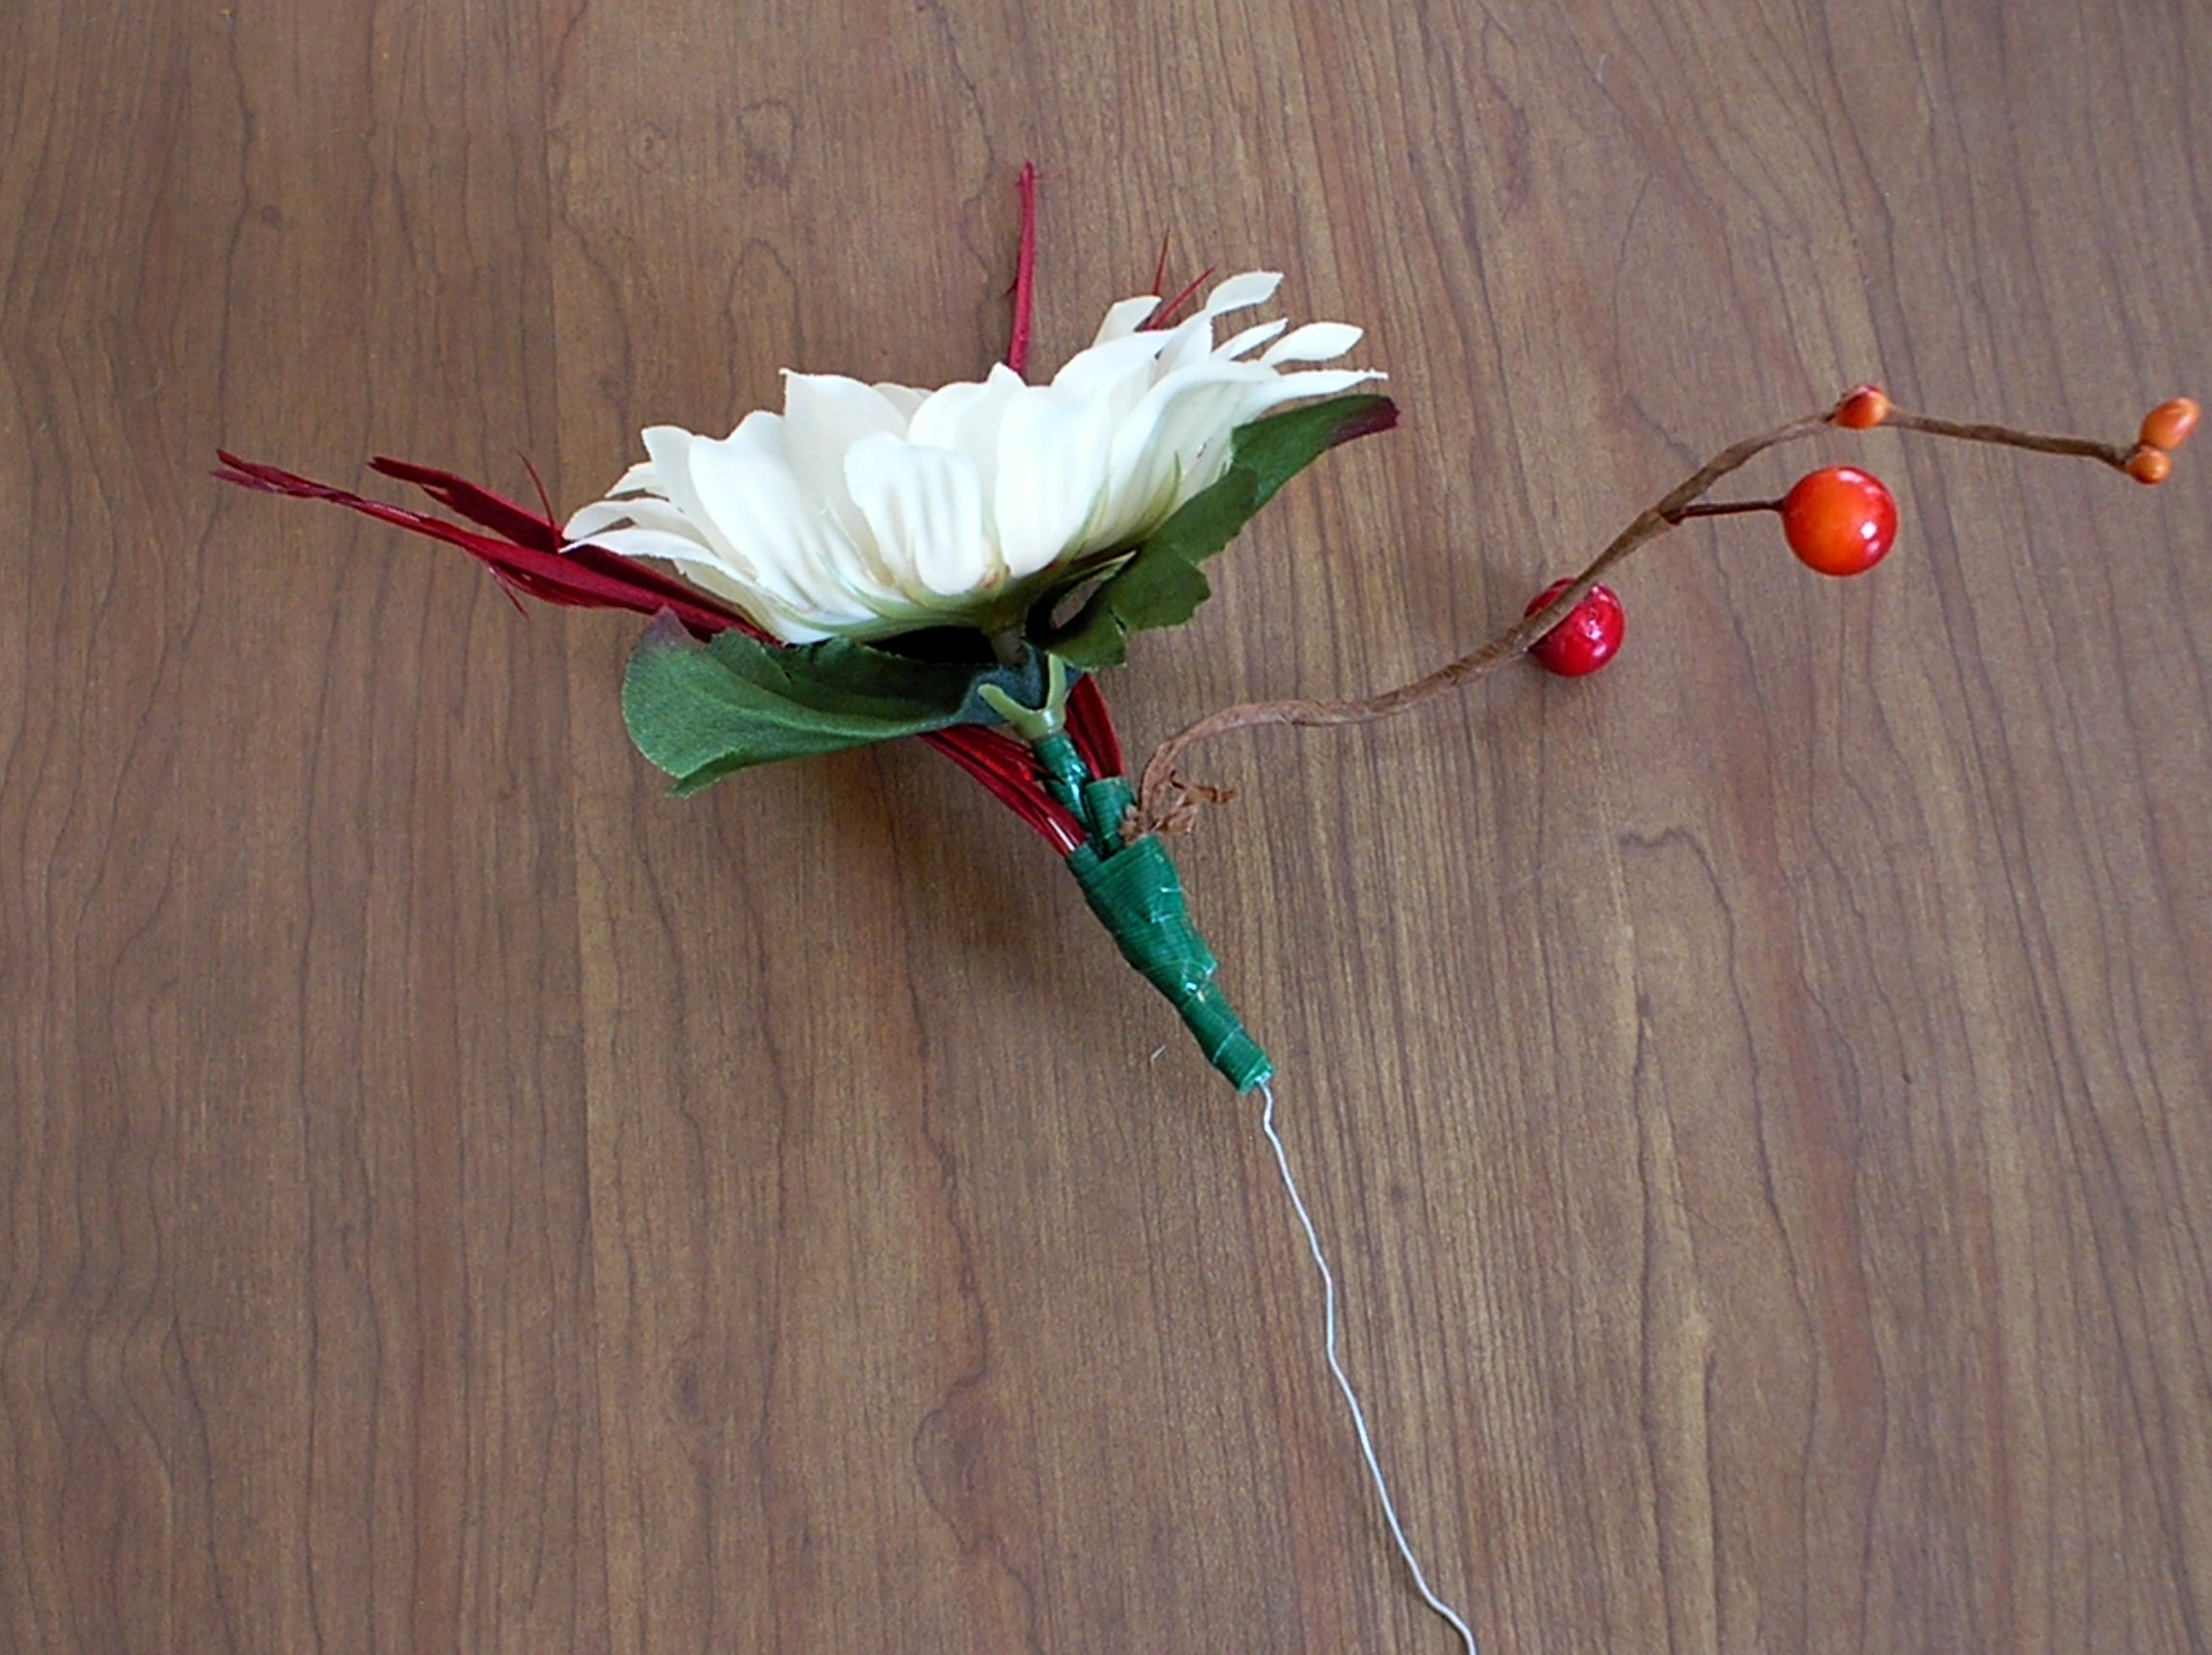
When choosing your flowers be sure to include various sizes and textures. You’ll want some single stem flowers (flowers with one long stem such as Carnations), some clusters (several blooms on one stem), some flowers that can “drape” (such as Freesia), and small flowers/greenery to tuck into any gaps. Here’s a tip for you—you might have all the “filler” greenery you need right in your own yard! Don’t be afraid to use trimmings from your own bushes.

The general rule for creating an arrangement in proportion to your container is to have the flowers equal to the height of your container, and 1 1/2 times the width. So, if my container is 6” high x 4” deep x 10” long the flower arrangement should be about 6”-8” at the highest point and drape over the edges 1” front and back and 2” or 3” on each side. Ready to have some fun?

You will need:

Container
Flowers
Wet Floral Foam
Florist’s blade or clippers
Craft blade to trim the foam
A bucket for soaking the floral foam
A bucket or vases to hold the flowers while working.

Optional:
Floral Tape to secure the foam
Plastic Bag to use with any non-watertight container
Decorative Cloth to use with a see-through container
Twine to secure the lid (if using a mini greenhouse)

Steps:

A few hours before working, or even the night before…

Unwrap your flower bouquets, trim a bit off of the stems, and place them in a bucket or vases to allow the flowers to perk up after being compressed. This is a great time to use the little flower-food packets included in the wrapping.

Soak the floral foam in a bucket of either plain water or water with flower food added. You can either measure the foam and trim prior to soaking, or trim it after it is fully wet. Once wet the foam is very easy to cut through.

Prepare the container…

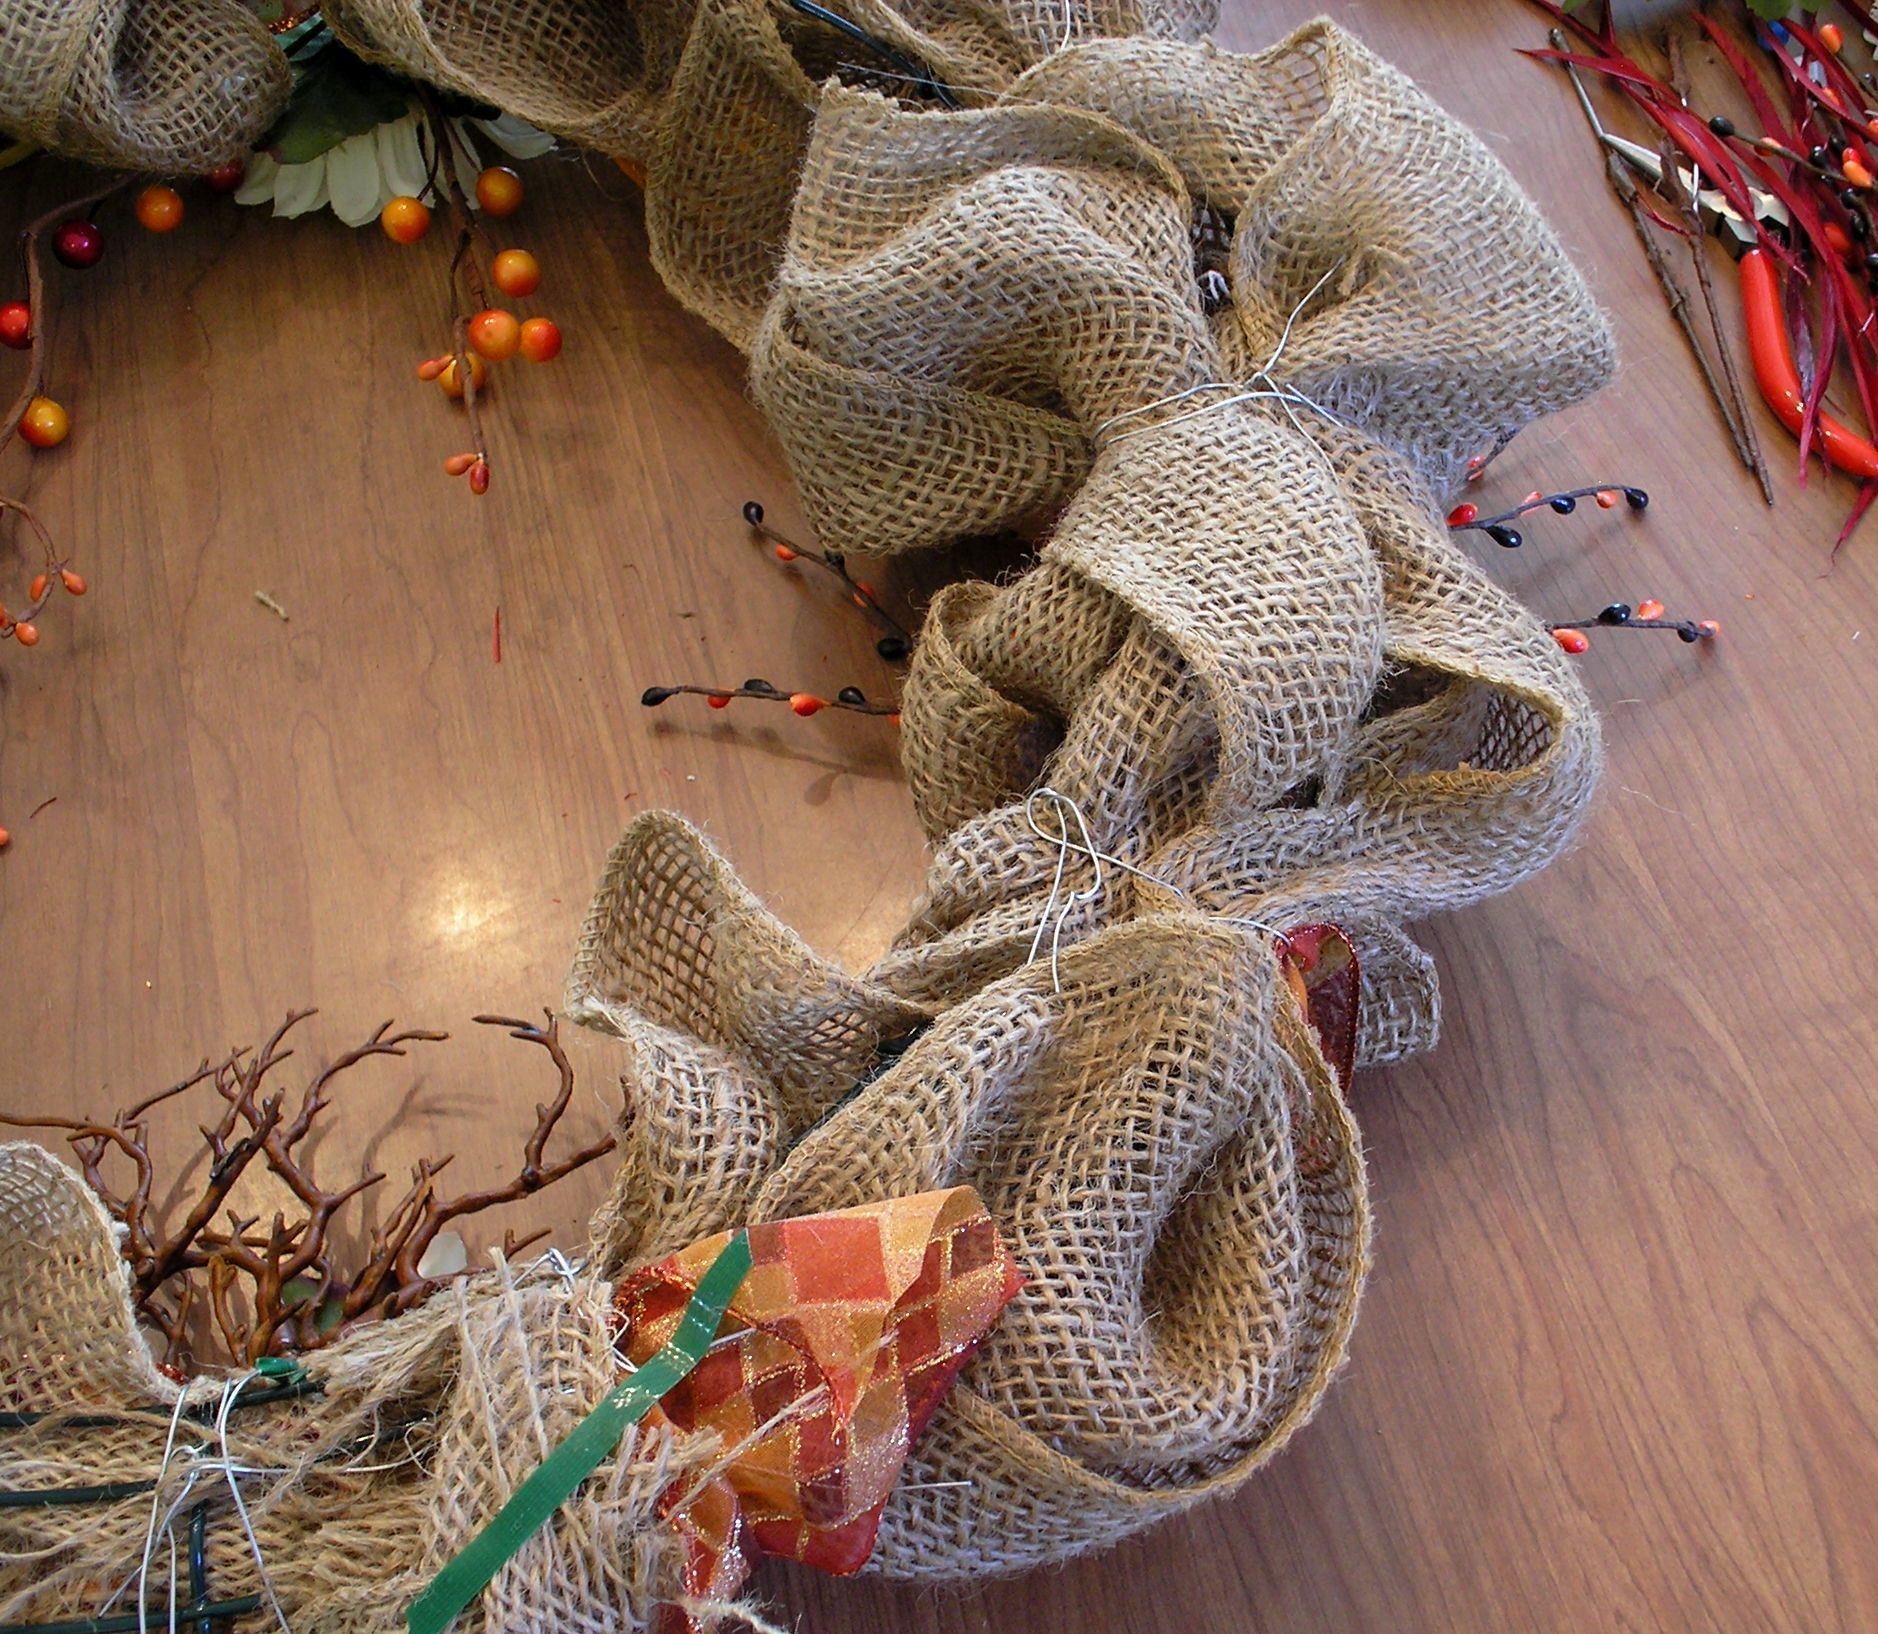
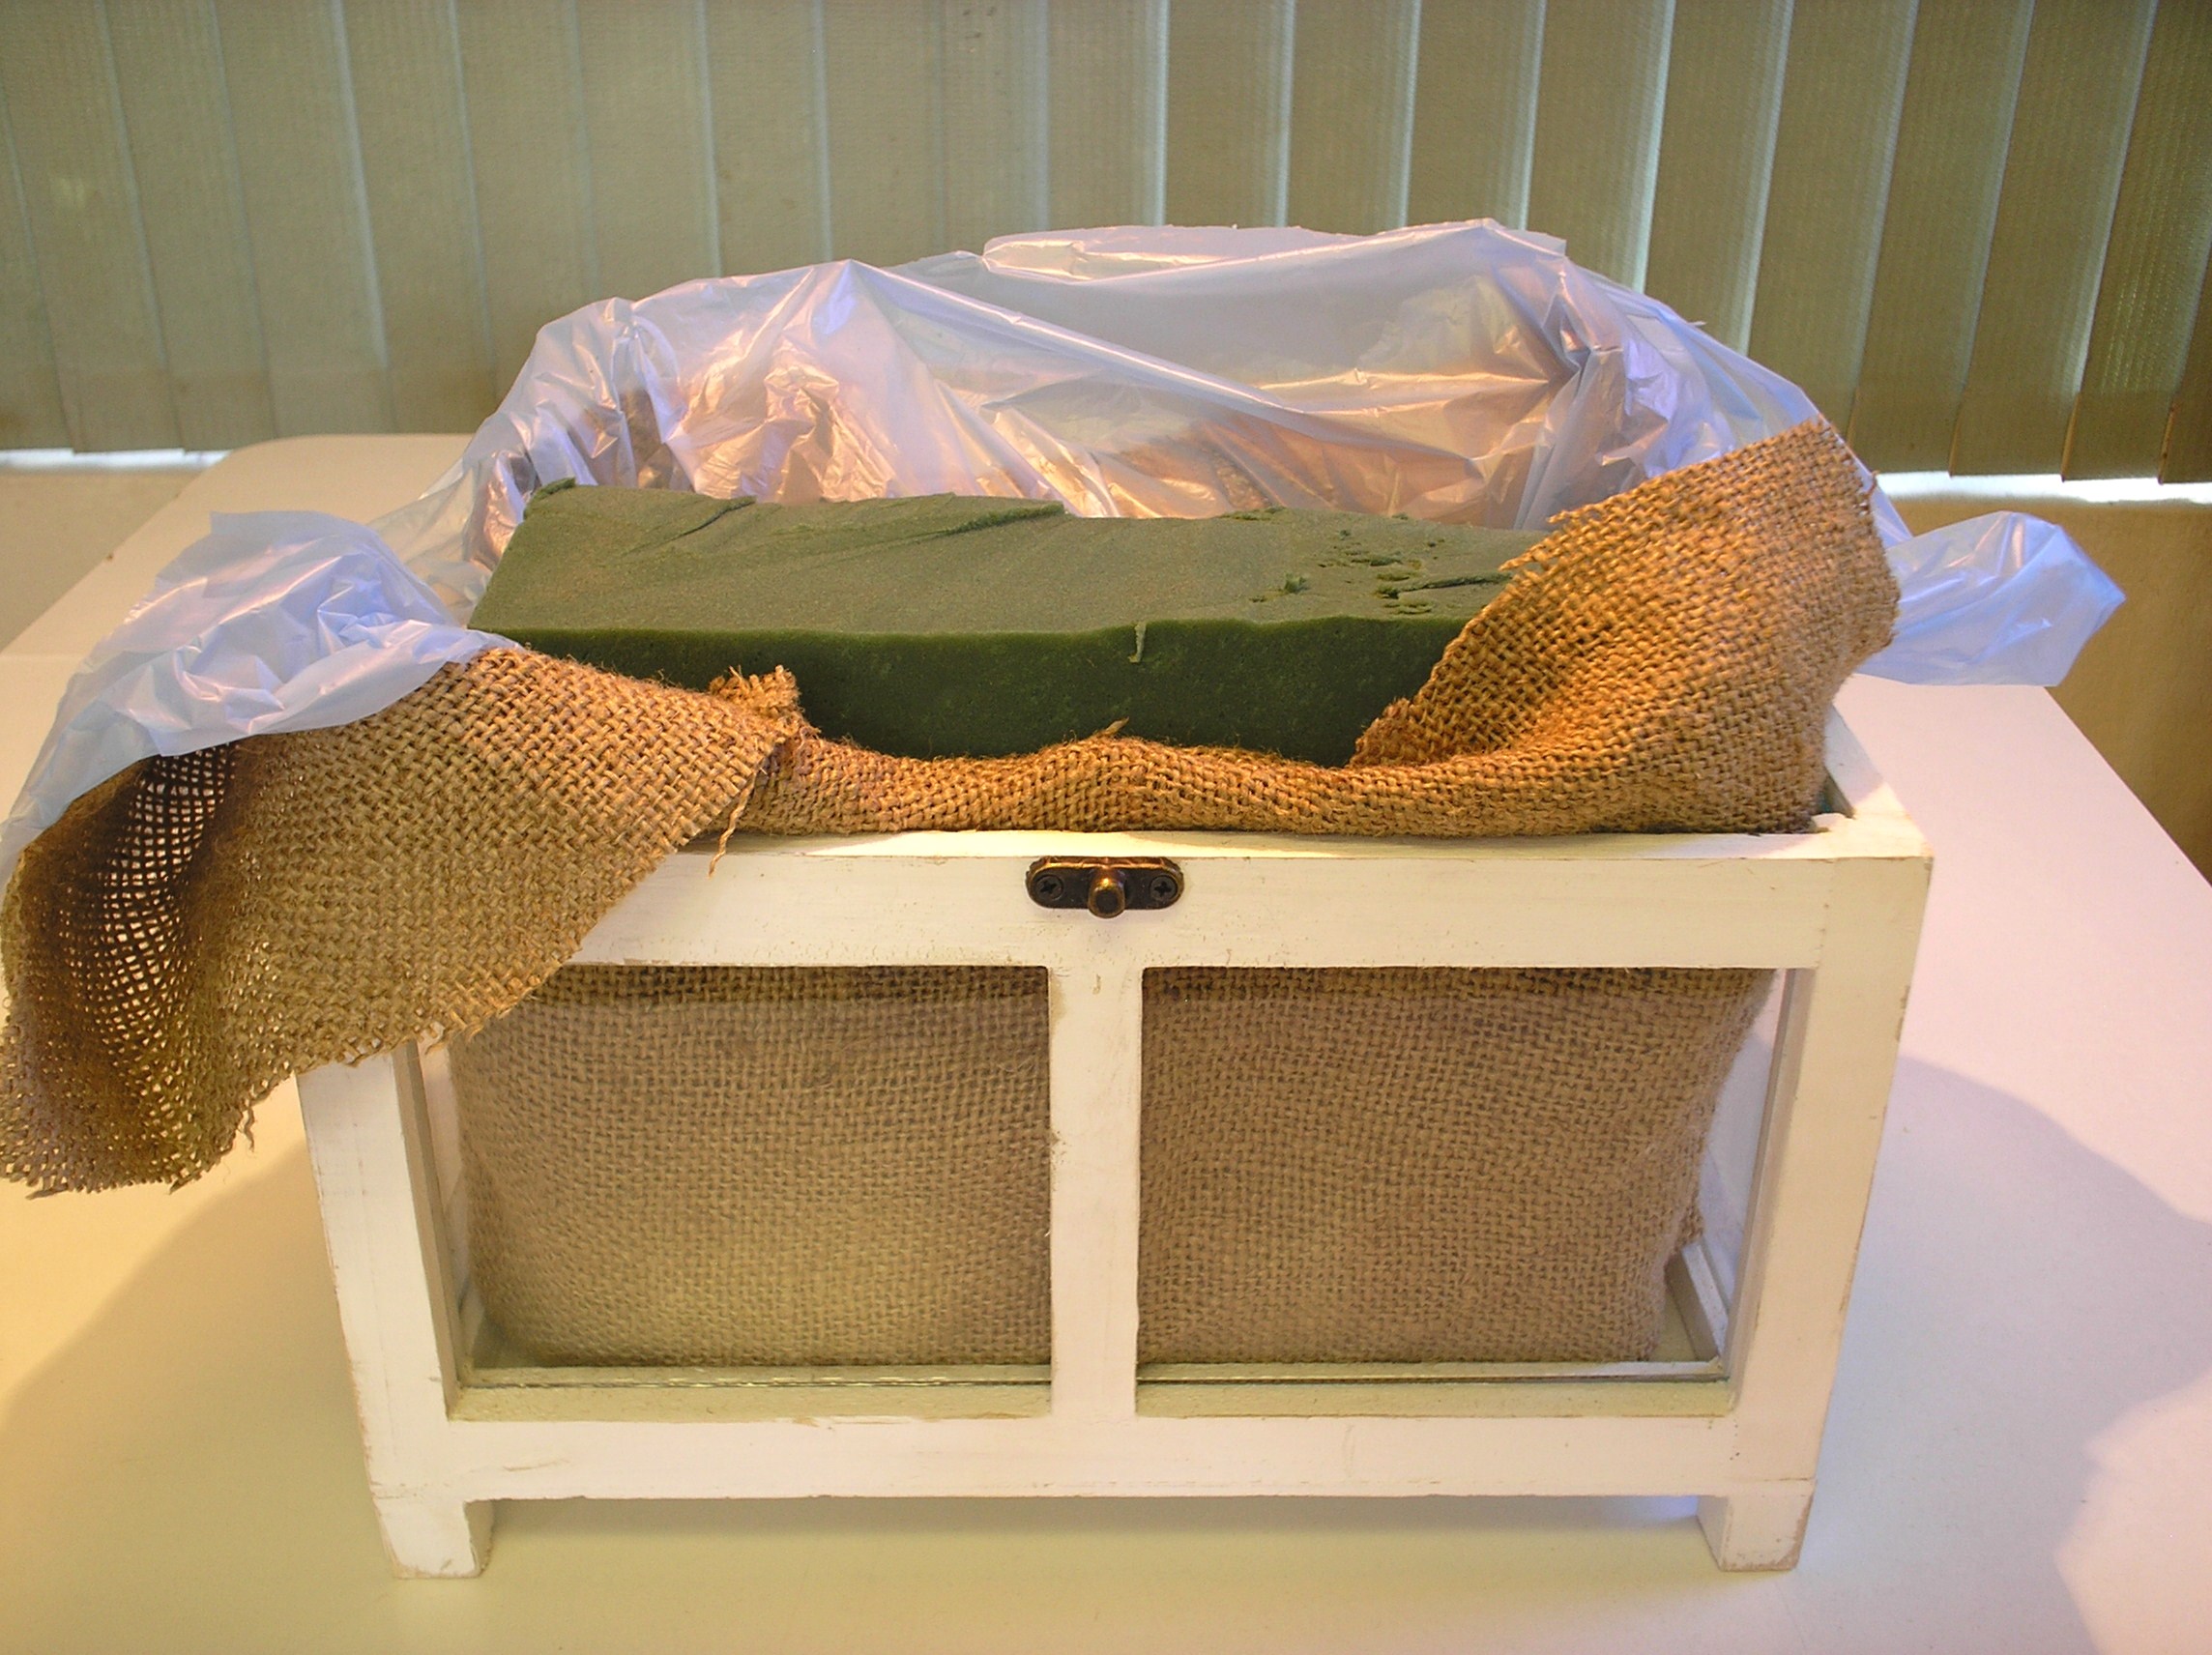
We are ready to create our arrangement. Since my container is glass, I’m going to start by placing some burlap in the greenhouse. Next, since my container isn’t watertight I’m adding a plastic bag. mini greenhouse arrangement by rlc

Now we can insert our floral foam. The floral foam is merely a tool for holding the flowers in place so it doesn’t have to fill the entire container. In fact, you want to leave room for the water. To keep your foam from shifting, you can either place florists tape across the top in a “+” pattern or simply cut a few small squares of foam to wedge in on the sides. Be sure your foam sits a bit higher than the container so you have someplace to insert the flowers around the sides—a couple inches is fine. Add a bit of water to keep your foam wet while you work. At this point I’m trimming away the excess burlap and plastic.

Creating your arrangement…

The general rule for floral design is to keep the eye moving in a triangle. This rule can be bent depending on your container, but the key is to keep the eye moving from bottom to sides to top. This is done by using either the same flowers, flowers of the same color, or the same type of flower in similar colors. We’ll call these your main stems. In addition to your main stems, you might want to choose one or two large blooms as your focal point. Large focal blooms are usually placed low in the arrangement or even resting on the rim of the container. The objective is to make the container part of the artistic expression; you don’t want it to look like your arrangement is floating above the pot. “Draping” flowers, such as Freesia, help to blend the container into the arrangement.

Note: When using foam, flowers are trimmed and arranged just as they would be for use in a vase. You want your stems to reach to the bottom of the foam where the water is. Never enter your stems horizontally. Make your stems as long as possible. mini greenhouse stem position by rlc

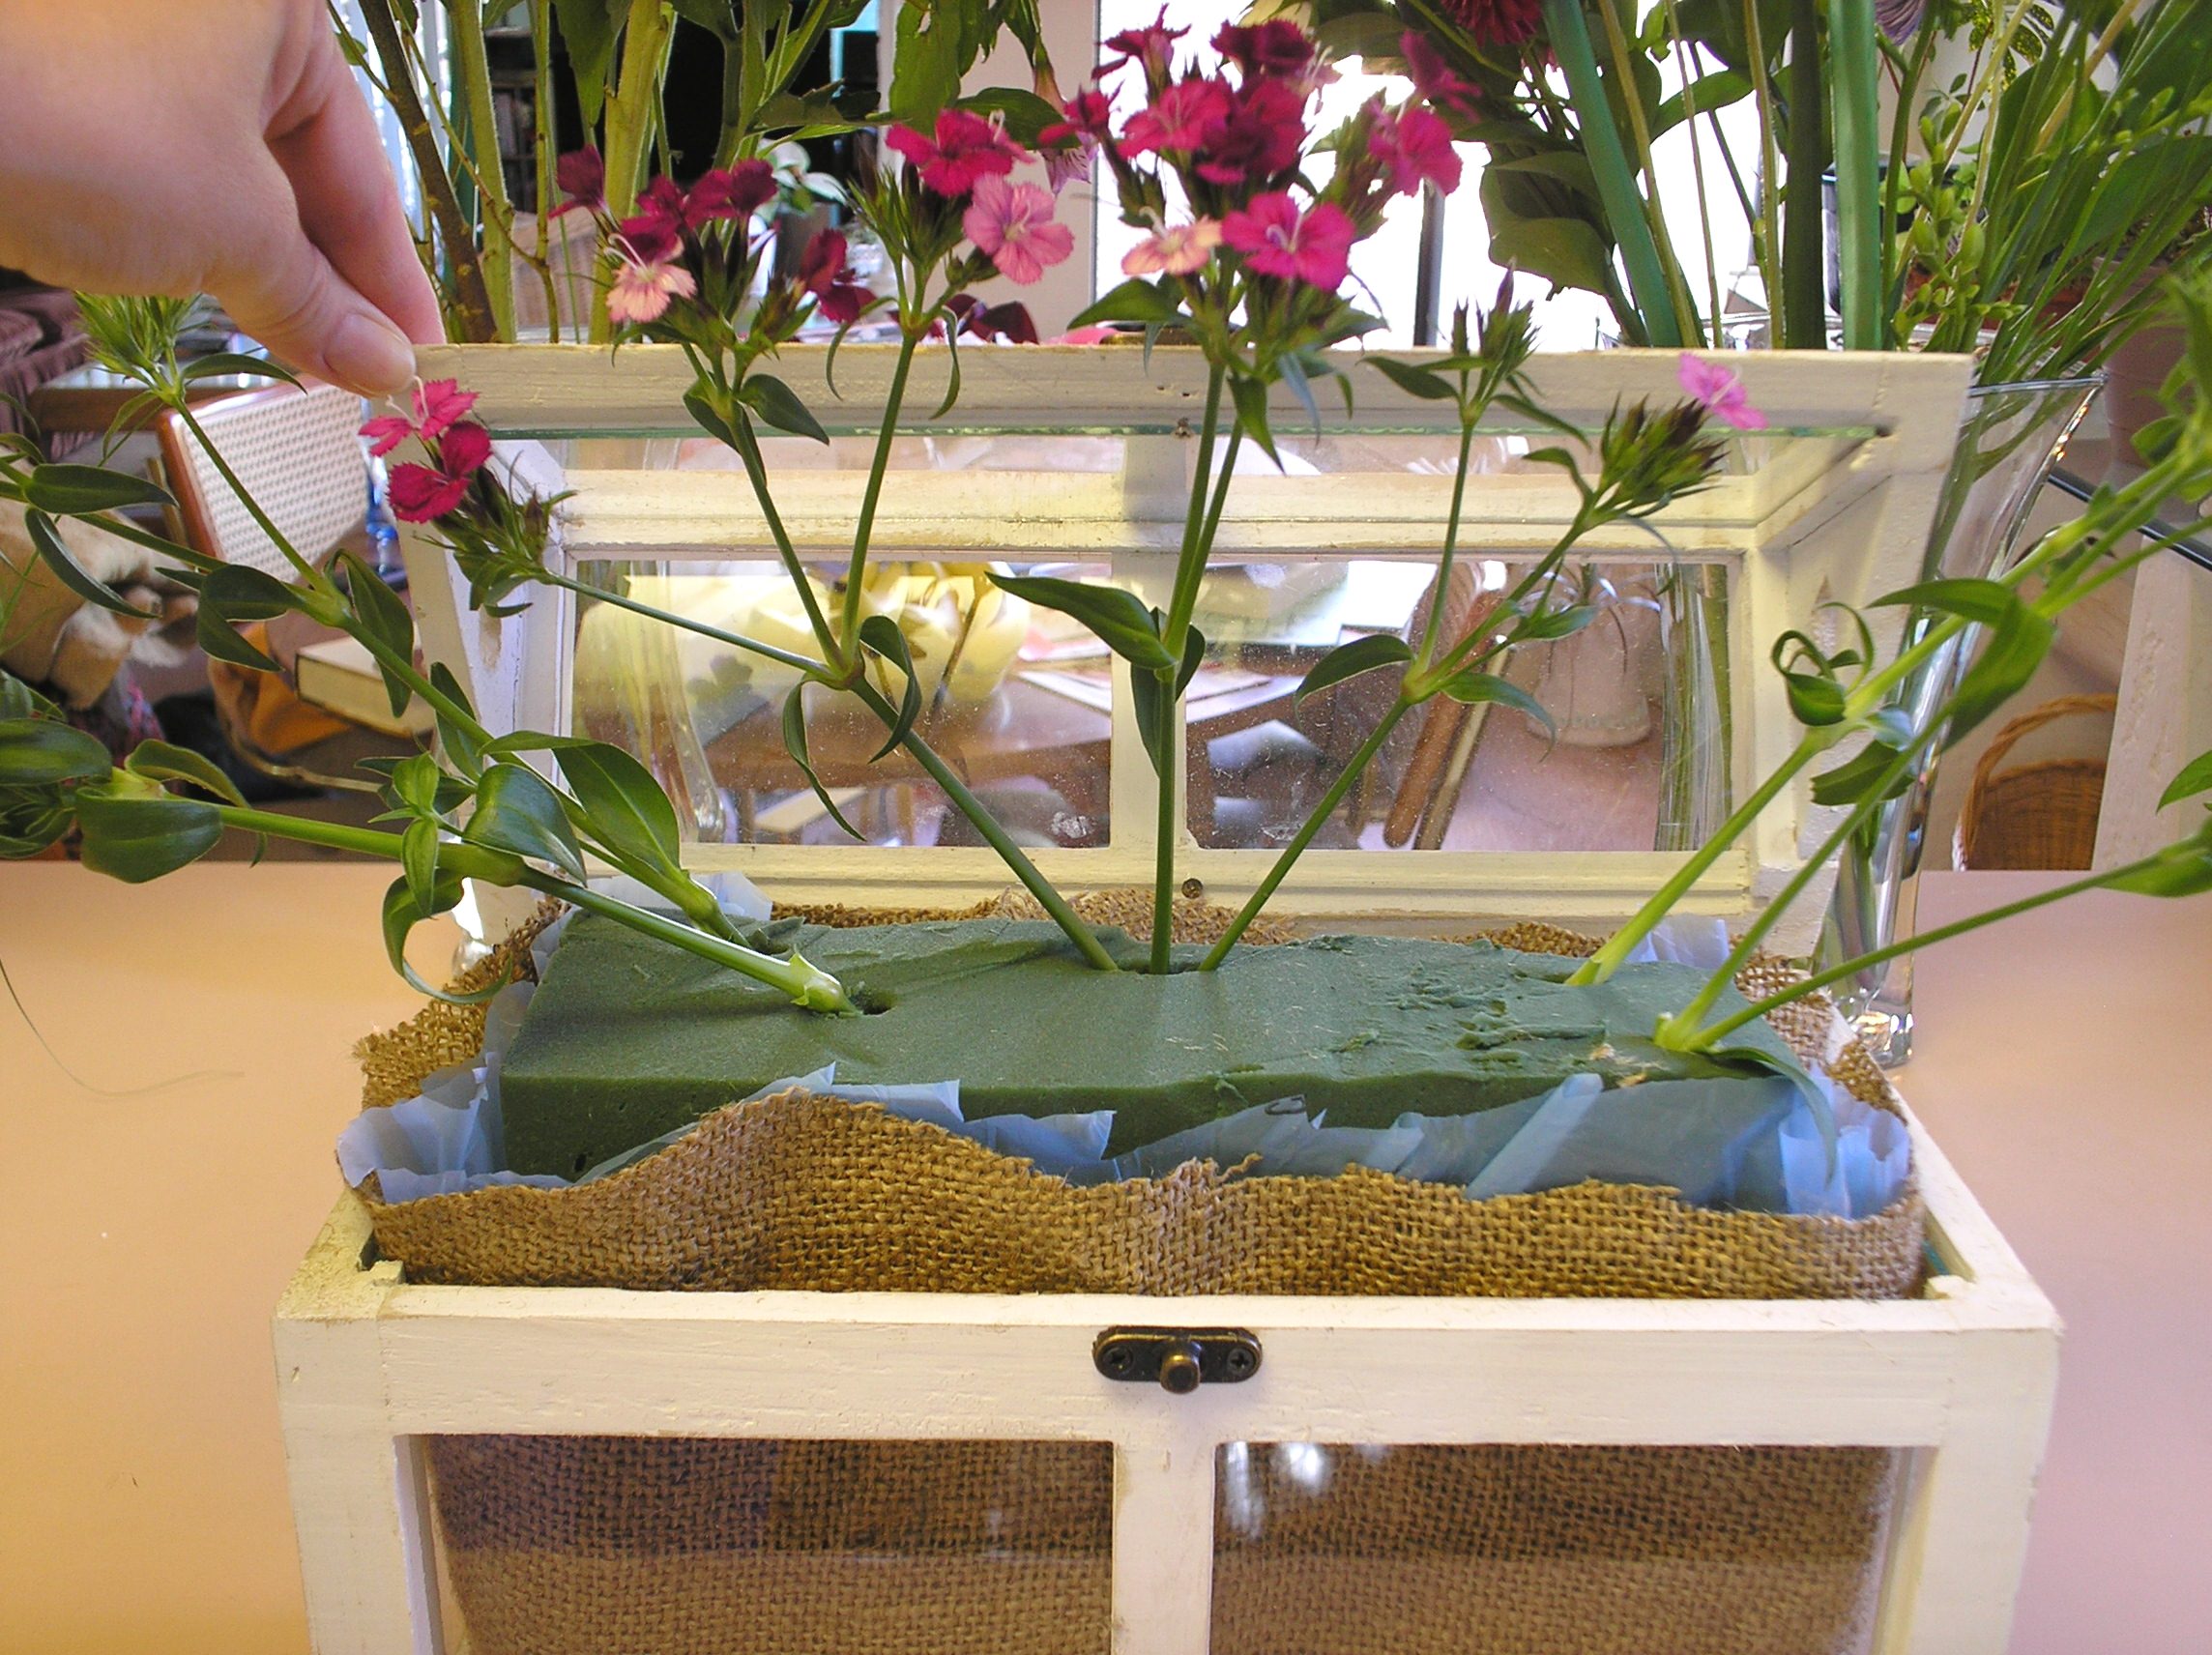
Let’s begin by using a few of our cluster stems to map out the proportions. At this time you can decide if there will be a back side to your arrangement. Place one tall cluster stem in the center (or the mid-back if your arrangement will be against the wall). Next, place stems of the same flower so they reach out to the edges of where your arrangement will end on all sides. The objective is to create the “bones” of your triangle.

For those of you using a greenhouse like I am, our focus is mainly on the front of the arrangement. Since we plan on propping the lid up, let’s make sure the flowers in the back are placed far enough towards the center to be out of the way of the lid. mini greenhouse mapping size by rlc

Once you have an idea of the shape and size of your arrangement you can begin placing your main stems. It’s always more pleasing to the eye to have two or more of the same flower placed together. So, if you want the eye to follow purple mums, for instance, place two or three mums at each side and a few at the highest point. You might also place some at the mid points between these.

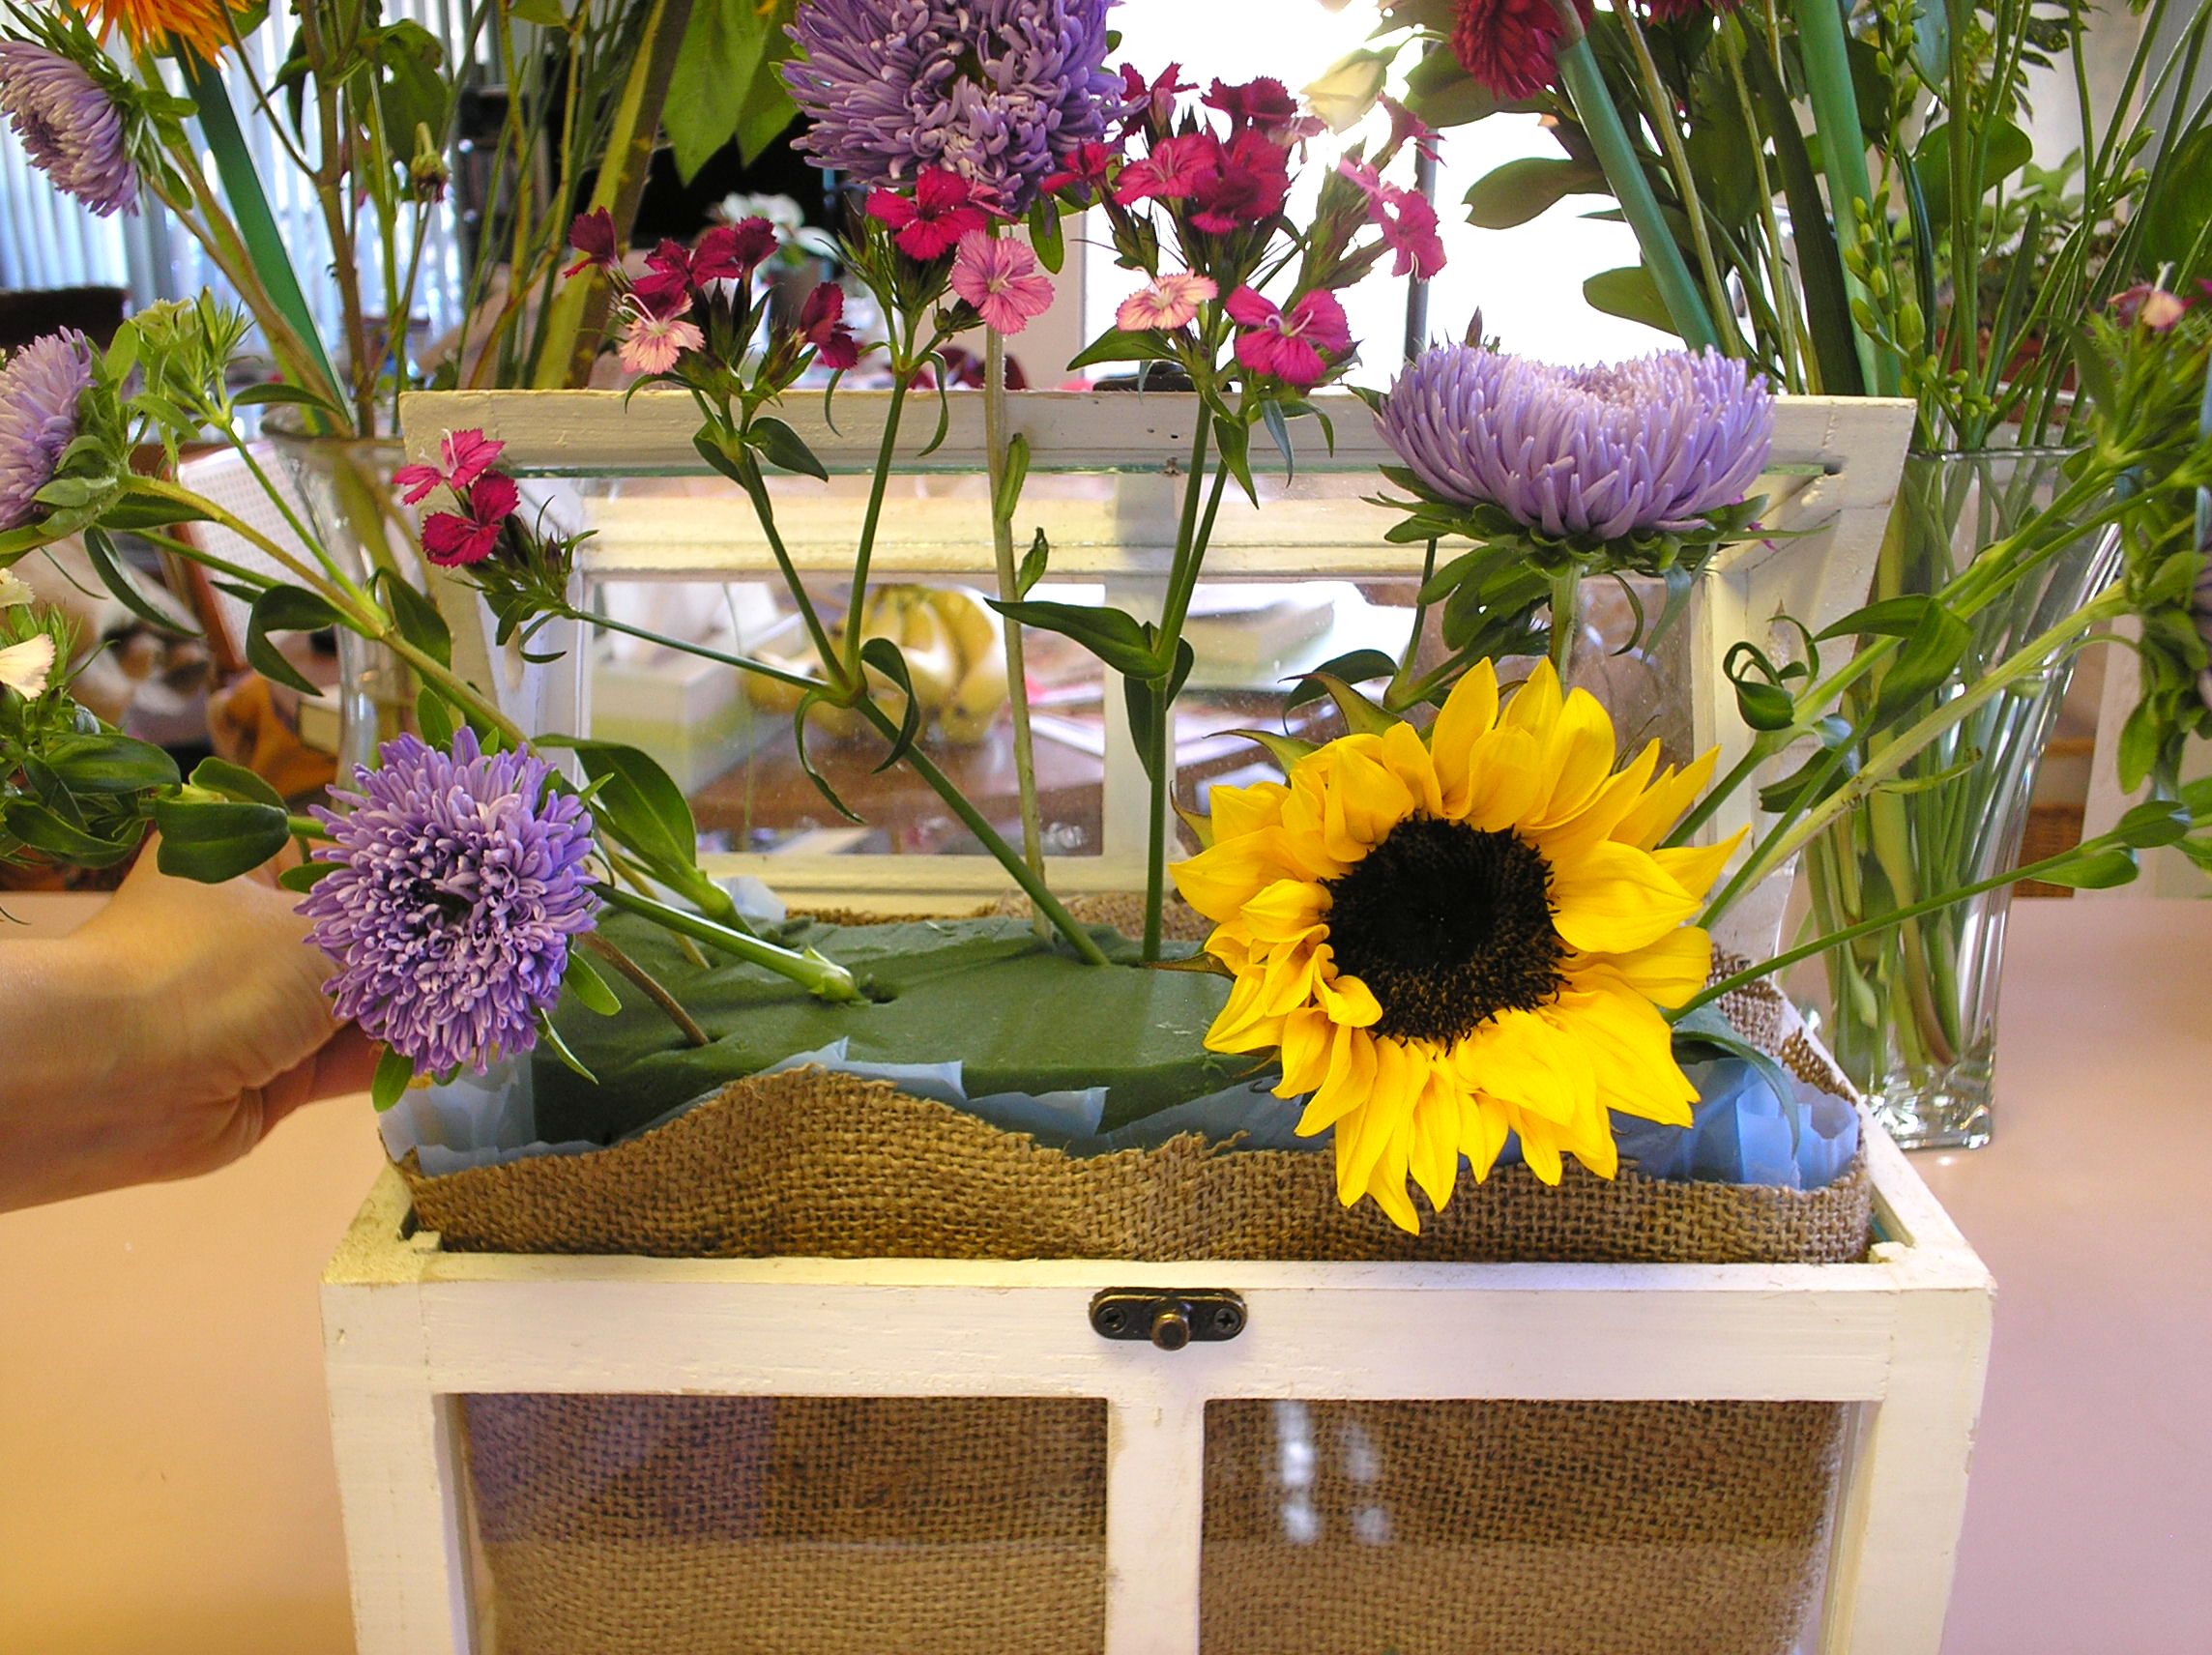
Next, place your focal flower(s). I’m using a sunflower. A focal flower is usually set off-center. mini greenhouse flower placement by rlc

Now you can fill in with the other stems. Remember to place more than one stem of a kind together. Vary the heights of the flowers to create depth. You’ll want to place the blooms so that they cover the stems of other flowers. This is especially true along the edges where you want the arrangement to blend with the container as a single artistic vision.

Your arrangement is almost finished. At this time, let’s fill in any blanks with our filler and greenery. Basically, you’ll want to cover any place where you can see floral foam or stems.

For those of you using a greenhouse, trim a few short pieces of greenery to cover the foam in the back. They should be short enough for the lid to clear the tops. We want anyone looking through the glass lid on the back of the arrangement to see plant material and not floral foam. mini greenhouse backside by rlc

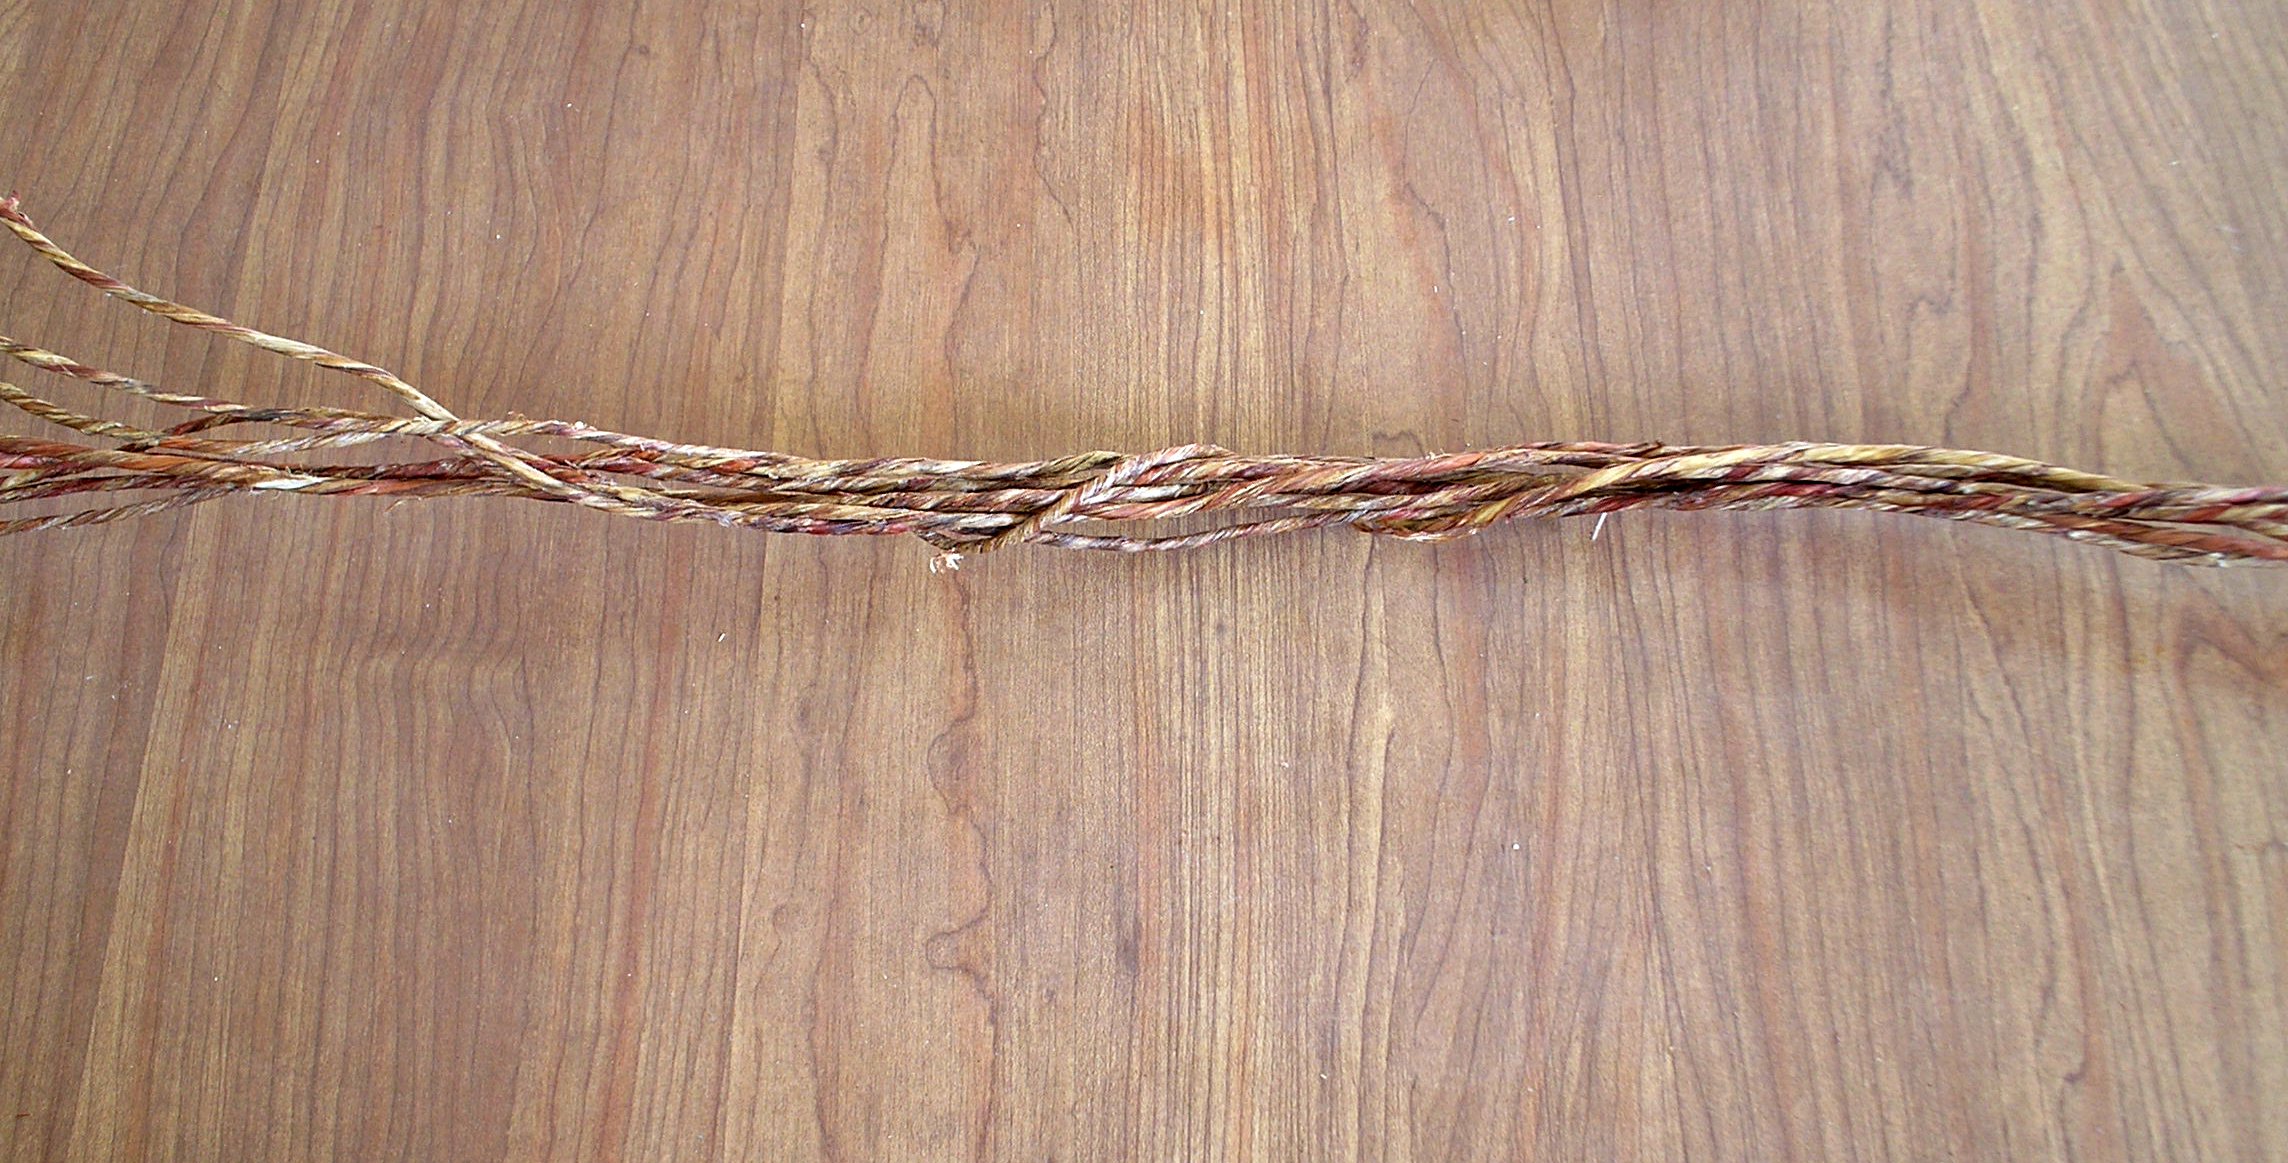
At this point we can prop up our mini greenhouse lids. Thread one end of your twine through latch on the lower box and tie a knot. Pass the twine up through your flowers and tie it around the hook part of the latch on the lid. Continue to use your “filler” stems to conceal the twine.

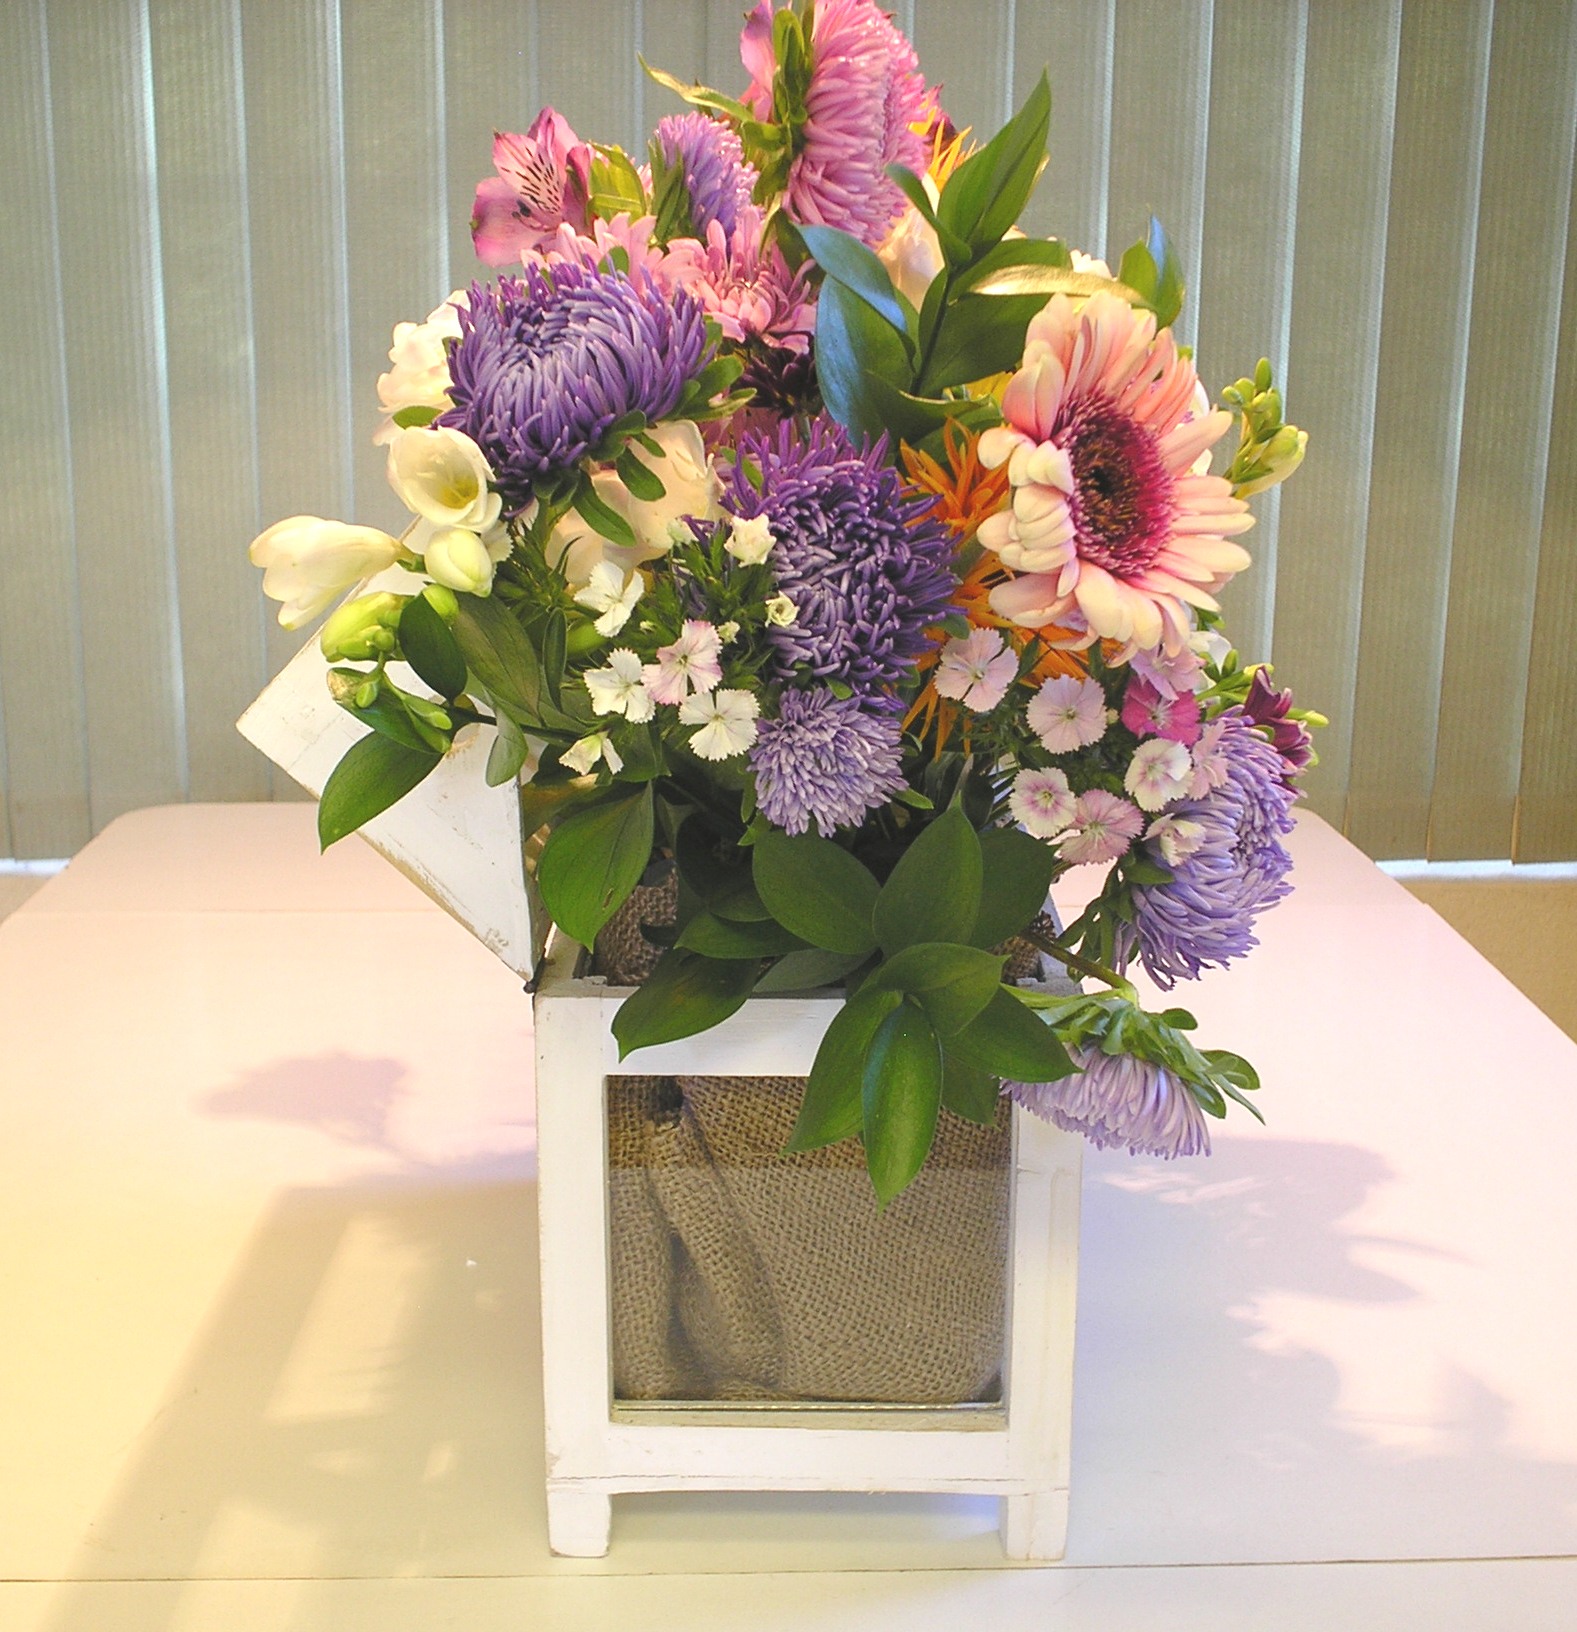
Tada—you’ve created a masterpiece! mini greenhouse arrangement finish

It’s so rewarding to make your own floral arrangements. First, it’s fun to watch your own skills increase. Your friends will absolutely love receiving arrangements you made yourself. And, you can finally decorate your home like those pictures in the glossy magazines–for less than half the cost of professional floral design! I worked the figures and determined that this arrangement would have cost $162.50 at the shop where I used to work—the DIY price was a mere $45.00.

mini greenhouse side 1 by rlc  mini greenhouse side 2 by rlc

Sneaky Art Book Review and Double Giveaway!

When we get right down to it, most of us create so we can share…smiles, joy, and beauty. Quick, easy crafts not only feed our desire to create and spread smiles, they also relieve stress by giving our analytical mind a break. Today I’m sharing a little book that makes it oh, so easy to sneak a bit of art time into your day—no matter what your age. The book is Sneaky Art by Marthe Jocelyn. I’ll be passing my copy on to one lucky winner–along with an extra prize—but first, let me tell you about the book.

MarthebookcoverSneaky Art: Crafty Surprises to Hide in Plain Sight is intended for ages 8-12 but appeals to sneaky artists of all ages. The projects are inexpensive and easily adaptable for large groups, making it a good resource for teachers, but the true beauty of the book lies in the underlying lessons in conceptualization and material re-purposing. For instance, can you make a boat using only the items in the recycle bin? Jocelyn uses wine corks or milk carton bottoms…what else could you use? What can you do with cupcake papers other than cover cupcakes? How about making them into fortune cookies!

Each of the twenty-four projects in Sneaky Art are presented in a simple format listing materials needed, craft instructions, suggestions on where to “sneak” your art, and pictures of the finished pieces in their “sneaky” locations. The author offers clear instructions that “Sneaky Art is not mean, defacing, ugly, hurtful, messy, or permanent. Sneaky Art is not graffiti or marking up someone’s property. Sneaky art is funny clever, thoughtful, subversive, playful, and surprising.” Jocelyn even suggests going back to the scene of our “sneak” and retrieving our art if it is still there. To this I will add my own suggestion that any art placed outdoors be created with good stewardship in mind. We don’t want to create litter, and we don’t want to endanger any wild life. So, any paints should be non-toxic. Do not use thin threads or fishing line as they can wrap around the feet of birds and small animals causing injury. Do not use colored beads or fake berries as birds may ingest them and get sick (or worse).

Would you like to win a copy of Sneaky Art? Details on how to win today’s special double giveaway are at the end of this post.

About the Book:

Sneaky Art: Crafty Surprises to Hide in Plain Sight By Marthe Jocelyn

  • Age Range: 8 – 12 years
  • Grade Level: 3 – 7
  • Hardcover: 64 pages
  • Publisher: Candlewick (March 26, 2013)
  • Language: English

Synopsis:

For young artists, tricksters, and crafters, here is a hip, friendly how-to manual for creating removable and shareable art projects from easily found materials. The sneaky part is in the installation! Each work of art is custom-created for display in public places — a tiny cork-bottomed boat in a public fountain, a plate of tiny paper cupcakes on your teacher’s desk, a penny left on the ground for a stranger, a funny message left on your mother’s bathroom mirror, and more. This utterly unique guide — part craft book, part art-philosophy — offers a stylish and sweet “made-you-look-twice” spirit of fun meant to put a smile on the faces of strangers and loved ones alike.

About the Author:

Marthe Jocelyn spent her childhood in Toronto reading books and putting on plays and circuses in her backyard. Marthe has a long string of jobs: theater usher, cookie seller, waitress, photo stylist, even toy designer before she finally settled on writer. She currently lives in Ontario with her daughters Nell and Hannah.

Marthe Jocelyn’s websites:

http://www.marthejocelyn.com/index.htm

http://sneakyart.com

Twitter: @scissorhouse

#SneakyArt

Double Giveaway!

As part of the Sneaky Art virtual book tour through Women OnMarthebookcover Writing, I am offering a double-prize package consisting of my hardcover, review copy of Sneaky Art and a Rainy Day Art Pack by Marthe Jocelyn.

The Rainy Day Art Pack comes with a body template and a selection of scraps for crafting (decorative paper, pompoms, feathers, yarn, buttons, etc…) Just add glue and scissors! More fun than paper dolls (remember them?) Where will this little character end up? He/she might become part of a collage…or even take part in a “sneaky art” caper!  Rainy Day Artpack

To Enter The Giveaway:

Leave a Comment: Tell us about a time you took part in a sneaky art caper OR tell us about something wonderful you or your child created with re-purposed items OR tell us why this book appeals to you. Make sure your email address is either in your profile or included in your comment so I can get in touch with you!

For additional Entries:

Tweet about this giveaway. Come back and leave the url to your tweet. Be sure to use the hashtag #SneakyArt in your tweet! (Each tweet gains an additional entry!)

Follow @scissorhouse on Twitter (and let us know)

Follow @RCchrps (that’s me) on Twitter (and let us know)

Visit A Ponderance of Things on Sunday, December 15th for more chances to win this Double Giveaway!

Contest runs December 13, 2013 through December 21, 2013. One random winner will be chosen from all entries gathered on Museiddity and A Ponderance of Things. One winner will win the prize package consisting of one hardcover copy of the book, Sneaky Art, and one Rainy Day Art Pack. Items to be mailed separately. Winner to be notified by email and posted in a blog update.

Good Luck!

Update: Congratulations to Pillows-a-la-mode for winning our Sneaky Art double prize! She has been contacted via email 🙂